Introduction
Welcome to the ultimate guide on best screen recorder for Mac and Windows. Let's begin by exploring our pre-installed screen recording tools and their corresponding keyboard shortcuts.
Built-in Screen Recorders for Mac and Windows
Before exploring third-party options, it's essential to understand and make the most of the built-in screen recorders provided by your operating system. Whether you're using Windows or macOS, both offer native solutions for capturing your screen.
Windows: How to Use Windows Built-in Screen Recorder?
Windows has made it convenient to record your screen without the need for third-party software. Here's how you can access and use this built-in feature:
-
Press Windows + G: This keyboard shortcut opens the Xbox Game Bar. While primarily designed for gamers, it includes a screen recording feature.
-
Confirm Recording: When the Xbox Game Bar overlay appears, click the "Yes, this is a game" box. It allows you to access the recording features.
-
Start Recording: Click the "Start Recording" button (a circle with a red dot). It begins your screen recording session.
-
Stop Recording: Click the square "Stop Recording" button in the same Xbox Game Bar overlay to end the recording.
-
Access Your Recordings: Your recordings get saved in the "Captures" folder, usually in the Videos library. You can also manage your recordings through the Xbox Game Bar's "Capture & Share" settings.
Record with the Snipping Tool (Windows 11)
The Snipping Tool, available in Windows 11 and via the Microsoft Store allows you to select a portion of your screen and start video recording apart from taking screenshots. Here's how you can access and use it for screen recording:
-
Open the Windows Snipping Tool by searching for it in the Start menu.
-
In the top toolbar, click the Record button, then select New.
-
Drag a rectangle to indicate the screen area you want to record.
-
Press Start and a 3-second countdown initiates your recording.
-
After finishing, click Stop. Once you have recorded a video, you can easily share it with others by copying and pasting the file or using the Share dialog. Additionally, you can find the recording in the Videos folder.
Now that you know how to use Windows' built-in screen recorder, let's move on to the screen recording options available for macOS users.
macOS: How to use macOS's Native Screen Recording Tool?
You have an in-built robust screen recording tool if you're a Mac user. Here's how to access and use it effectively:
-
Press Shift + Command + 5: This keyboard shortcut opens the "Screenshot" toolbar.
-
Select Screen Recording: In the toolbar, you'll find options for capturing screenshots and recording your screen. Choose the "Record Entire Screen" or "Record Selected Portion" option based on your preference.
-
Start Recording: To start your screen recording session, click the "Record" button.
-
Stop Recording: To end the recording, click the stop button from the top menu (or press Shift + Command + Esc keys).
-
Access Your Recordings: Your screen recordings get saved by default on the Desktop. To select a different folder to save your screen recording, go to the "Options" menu on the toolbar.
Now that you're familiar with the built-in screen recording options for both Windows and macOS, you can decide if these native tools meet your requirements or if you'd like to explore additional third-party software options. The following sections guide you through the top six best screen recording software.
Best Screen Recorder for Mac and Windows in 2024
1. Fliki AI Screen Recorder
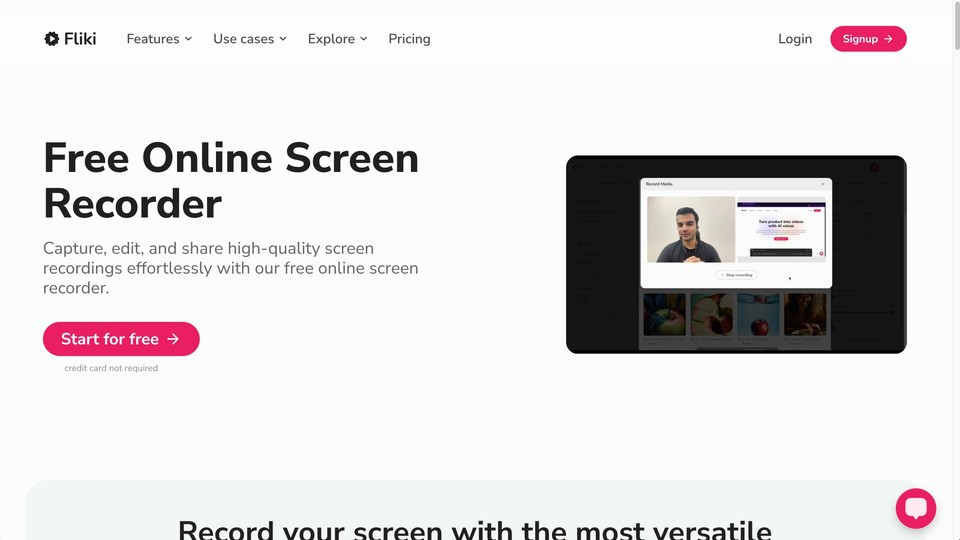
Platform: Fliki AI Screen Recorder is a web-based solution available on both Windows and macOS.
Pricing: Fliki AI Screen Recorder offers a free version with versatile recording options.
What is Fliki AI Screen Recorder?
Fliki AI Screen Recorder is a versatile AI tool that enables you to record your device's screen, webcam, and voice all in one place. It's perfect for creating business presentations, explainer videos, gaming walkthroughs, and more. Whether you want to record yourself, your screen, or both simultaneously, Fliki offers a seamless experience.
Features of Fliki AI Screen Recorder
-
Screen Recording: Record your screen for up to 30 minutes in one go on the paid plan and up to 10 minutes on the free plan.
-
Video Recording: Record high-quality video footage, whether it's from your webcam or other video sources.
-
Audio Recording: Record your voice directly from the interface, adding a personal touch to your content.
-
2000+ Realistic AI Voices and Voice Cloning: If you prefer not to use your own voice, Fliki offers 2000+ realistic AI voices in 80+ languages that can narrate your content. You can simply provide the text, and the AI voice will do the rest. You can even clone your own voice. [Learn more]
-
Translation to 80+ Languages: If using the AI voiceover feature, you can translate your content into over 80 languages in a few clicks.
-
Virtual AI Presenters: When using AI voiceover, incorporate virtual AI presenters to enhance your presentations and videos.
Pros and Cons of Fliki AI Screen Recorder
Pros:
-
Scene-based editing for easy edits
-
High-quality video and audio recording
-
User-friendly interface
-
Versatile recording options for different needs
-
AI voice support in 80+ languages
-
Voice cloning and talking avatar options
-
Free version available
Cons:
-
Cloud-based functionalities may require a stable internet connection
Overall: Fliki AI Screen Recorder stands out as a top choice for anyone needing a straightforward, high-quality screen recording solution. It's perfect for creating educational content, training videos, and more, with a user-friendly interface and versatile recording options.
2. OBS Studio
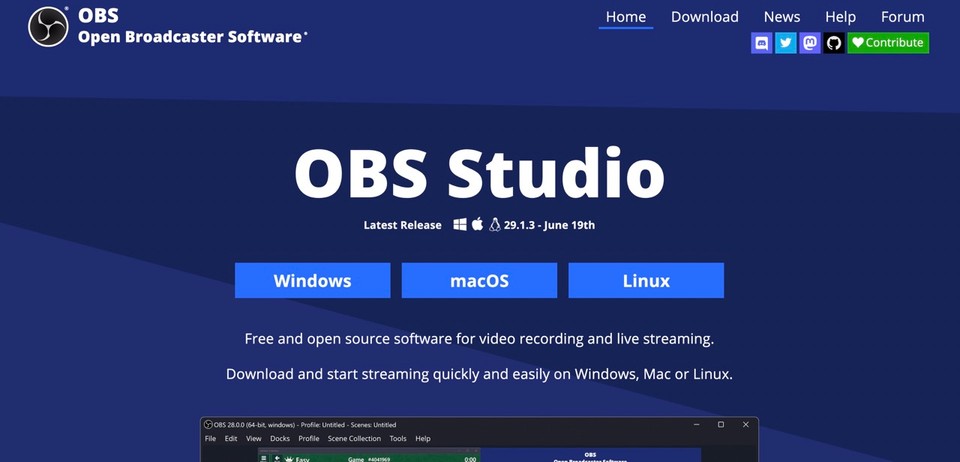
Platform: OBS Studio is available for Windows, macOS, and Linux.
Pricing: OBS Studio is free and open-source.
What is OBS Studio?
OBS Studio is free (and open source) screen recording and live streaming software. It is a powerful tool that you can use to record and stream video and audio from various sources, including your computer screen, webcam, and microphone.
Features of OBS Studio
-
Supports recording and live streaming of video and audio
-
Can record multiple scenes and switch between them seamlessly
-
Supports a variety of video output formats, including MP4, MKV, MOV, and more
-
Includes a variety of plugins to add additional features, such as chat overlay and donation alerts
-
Highly customizable interface
Pros and cons of OBS Studio
Pros:
-
Free and open-source software
-
Powerful and versatile tool
-
Supports a variety of output formats
-
Highly customizable interface
-
Active community of developers and users
Cons:
-
It can be complex to set up and use
-
It is not as user-friendly as some other screen recorders
-
It can be resource-intensive, especially when streaming
Overall, OBS Studio is a powerful, versatile screen recording and live streaming software that is free and open-source. It is a fantastic choice and one of the best screen recorders for experienced users.
3. Loom
Platform: Loom is available for Windows, macOS, ChromeOS, iOS, and Android.
Pricing: Loom has a free plan that allows you to record up to 25 videos per month, each with a maximum length of 5 minutes. Paid plans start at $12.50 monthly and offer unlimited recordings, longer video lengths, and other features.
What is Loom?
Loom is a cloud-based screen recording and video messaging tool. It is a quick and easy way to record and share videos of your device's screen and webcam. Loom videos are embedded in a shareable link, so you can easily send them to others via email, chat, or social media.
Features of Loom
-
Easy to use: Loom is a straightforward tool to use. Just click the Loom button to start recording, and click again to stop.
-
Shareable links: Loom videos are embedded in a link, so you can easily send them to others.
-
Annotated videos: You can annotate your Loom videos with text, drawings, and arrows. It is a great way to add clarity and context to your videos.
-
Cloud-based: Your loom videos are securely stored in the cloud, ensuring easy accessibility from anywhere.
Pros and cons of Loom
Pros:
-
Easy to use
-
Shareable links
-
Annotated videos
-
Cloud-based
-
Free plan available
Cons:
-
Video length is limited in the free plan
-
No advanced features, such as chroma key or multi-track recording
Overall, Loom is an excellent choice for anyone who needs to quickly and easily record and share videos of their screen and webcam. It's perfect for both personal and professional use and is one of the easiest screen recorders on the market.
4. Movavi Screen Recorder

Platform: Movavi Screen Recorder is available for Windows and macOS.
Pricing: Movavi Screen Recorder has a free trial available. The paid plans start at $42.95 for the Personal license and $59.95 for the Lifetime license.
What is Movavi Screen Recorder?
Movavi Screen Recorder is a screen recording tool that you can use to capture or record your screen and audio in high definition. It also includes features like webcam recording, cursor effects, and annotations.
Features of Movavi Screen Recorder
-
Screen recording: Movavi Screen Recorder can record your screen and audio in high definition.
-
Webcam recording: Movavi Screen Recorder can also record your webcam so that you can add yourself to your recordings.
-
Cursor effects: Movavi Screen Recorder includes a variety of cursor effects, so you can make your cursor more visible or add fun animations.
-
Annotations: Movavi Screen Recorder includes various annotation tools to add text, drawings, and arrows to your recordings.
-
Editing: Movavi Screen Recorder includes essential video editing tools to trim, crop, and add effects to your recordings.
-
Exporting: Movavi Screen Recorder can export your recordings to various formats, such as MP4, AVI, and GIF.
Pros and cons of Movavi Screen Recorder
Pros:
-
Easy to use
-
User-friendly interface
-
Wide range of features
-
Affordable pricing
-
Regularly updated with new features and improvements
Cons:
-
Limited Access to Video Editing in the Lifetime version
-
UI/UX feels outdated
Overall, Movavi Screen Recorder is a good choice for anyone who needs an easy-to-use screen recording software with various features. It is an excellent choice for creating tutorials, demos, and other types of videos.
5. Cleanshot X
Platform: CleanShot X is only available for macOS.
Pricing: CleanShot X has a free trial available. The paid plans start at $29 for the App + Cloud Basic (lifetime) plan and $10 monthly for the App + Cloud Pro plan.
What is CleanShot X?
CleanShot X is a screen recording and screenshot software for macOS. It is a powerful tool that you can use to record your screen, take screenshots, and annotate your captures. CleanShot X includes various other features, such as a scrolling capture, a timer, and a blur tool.
Features of CleanShot X
-
Screen recording: You can use CleanShot X as a screen recorder to record your screen in high definition, with or without audio.
-
Screenshot: CleanShot X can take screenshots of your entire screen, window, or a selected area.
-
Annotations: CleanShot X includes various annotation tools to add text, drawings, and arrows to your captures.
-
Automatically hide notifications: CleanShot X can automatically hide notifications while recording.
Pros and cons of CleanShot X
Pros:
-
Powerful and versatile tool
-
Wide range of features
-
Easy to use
-
User-friendly interface
-
Regularly updated with new features and improvements
Cons:
-
Video editing options are limited.
-
It is primarily a screenshot tool with a screen recording as one of the features.
Overall, CleanShot X is a powerful, versatile screen recording and screenshot software that is easy to use. It is an excellent choice for anyone who needs to create high-quality captures on macOS.
6. ShareX
Platform: ShareX is available for Windows only.
Pricing: ShareX is free and open-source software. There is no paid version.
What is ShareX?
ShareX is a free screen recording and screenshot software for Windows. You can easily capture and share any section of your screen with this tool. ShareX includes other features like image editing, file uploading, and annotation.
Features of ShareX
-
Capture or record any area of your screen
-
Share your captures with a single press of a key
-
Edit your captures with a built-in image editor
-
Upload your captures to a variety of destinations
-
Automate your captures with a variety of triggers
Pros and cons of ShareX
Pros:
-
Free and open-source software
-
Powerful and versatile tool
-
Wide range of features
-
Highly customizable
-
Active community of developers and users
Cons:
-
Can be complex to set up and use
-
It is not as user-friendly as some other screen recording software
Overall, ShareX is a decent screen recording and screenshot software that is free and open-source. It is a good choice for both beginners and experienced users.
Transforming Screen Recordings into Tutorials
As you've explored the world of screen recording software and gained insights into optimizing your recordings, it's natural to consider what comes next. Many individuals seek to turn their screen recordings into comprehensive tutorials, effectively conveying their knowledge to their audience. It's where a tool like Fliki can play a pivotal role in taking your recordings to the next level.
Fliki steps in as a powerful AI-based video generator that can transform your raw screen recordings into polished and engaging tutorials. Here's how Fliki seamlessly fits into your tutorial creation process:
1. Converting Text into Voiceovers
-
Text-based Content: You may have written guides, scripts, or explanations accompanying your screen recordings.
-
Fliki Integration: Fliki allows you to convert this text content into professional-grade voiceovers for your videos. You can also add your voiceover recorded via audio recording software or leverage its voice cloning feature.
2. Elevating Visual Appeal
-
Enhancing Visuals: Your screen recordings provide the visuals, but Fliki lets you strengthen them further.
-
Images and Animations: Incorporate pictures, gifs, and text overlays to reinforce your tutorial's key points.
3. Language Diversity
-
Global Audience: Your screen recordings may have universal appeal, requiring voiceovers in different languages.
-
Fliki's Diverse Voices: Fliki offers over 1900 voices in 77 languages and 100+ dialects, ensuring your tutorial reaches a broader audience.
4. Seamless Integration
-
User-Friendly: Fliki's user-friendly interface makes it accessible to individuals without extensive video production skills.
-
Tutorial Completion: With Fliki, you can efficiently complete your tutorial, adding more professionalism.
A Glimpse into Fliki
To better understand how Fliki works and how it can amplify your tutorial creation process, you can watch this insightful tutorial
Remember, while screen recording software captures the action, Fliki transforms your raw recordings into comprehensive and engaging tutorials. It bridges your expertise and your audience's understanding, ensuring your tutorials leave a lasting impact.
Conclusion
Congratulations on journeying through the six best screen recording software for 2024. By now, you have gained valuable insights into various aspects of screen recording, from built-in options to free and paid third-party software.
Remember to stay updated with the latest screen recording software and technological advancements as technology evolves. Experiment, learn, and refine your skills to create outstanding screen recordings that captivate and inform your audience.