Introduction
Did you know that videos on social media are shared a whopping 12 times more than text and images combined? That's a big deal! It shows just how much people love watching and sharing videos online.
But here's the thing: as videos get better quality, they also get bigger. This can make it tricky to share them easily or store them without taking up too much space.
That's where video compression comes in. It's like magic that makes your videos smaller without losing their quality. This guide shows you some easy ways to compress your videos so they're still awesome but won't take up all your storage space.
So, if you want your videos to stand out and be easy to share, stick with us as we explore how to compress them without losing their awesomeness. Let's get started!
What is Video Compression, and Why Does It Matter?
In the world of videos, size does matter, and that's where video compression comes into play. But before we dive into the "how," let's understand the "what" and "why" behind video compression.
What is Video Compression?
Video compression is like a superhero for your videos. It's the process of making video files smaller while keeping them looking good and sounding great. Think of it as a magic trick that helps you share and store videos without occupying too much space.
Why Does Video Compression Matter?
Here's the deal: big video files can be a real headache. They eat up storage, make sharing a hassle, and slow down streaming. Video compression steps in to save the day, and here's why it's so important:
-
Storage Efficiency: Compressing videos makes them smaller, saving you precious storage space.
-
Smooth Streaming: Smaller videos need less internet bandwidth, ensuring smooth playback without annoying buffering.
-
Better Playback: Compressed videos load faster and play smoothly on most devices, from your smartphone to your computer.
-
Bandwidth Savior: Streaming services can deliver content more efficiently, saving bandwidth and giving users a consistent experience.
-
Editing Made Easy: Professionals use compressed versions, called proxy files, for smoother video editing without overloading their systems.
In short, video compression is a valuable tool for efficient video sharing, storage, and playback. Now, let's explore the types of video compression and find the right balance between file size and video quality.
The Two Types of Video Compression
Now that we've grasped the importance of video compression, let's dig deeper into the two main types: Lossy and Lossless. Understanding these types will guide us in choosing the right balance for compressing our videos.
1. Lossy Compression: Striking the Balance
-
Data quality: Lossy compression reduces file size by sacrificing some data quality.
-
Advantages: Greatly reduces file sizes while maintaining acceptable quality.
-
Considerations: Care must be taken not to overcompress, leading to noticeable quality loss, artifacts, or pixelation.
-
Typical Use Cases: Perfect for video streaming, conferencing, and sharing platforms like YouTube.
2. Lossless Compression: Preserving Original Quality
-
Data quality: Lossless compression achieves compression without sacrificing any data quality.
-
Advantages: Retains all original data, allowing for perfect reconstruction of video and audio.
-
Considerations: Reversible process, ideal for situations where preserving original quality is crucial, such as medical imaging or video editing workflows.
-
Typical Use Cases: Used in scenarios where every detail matters, like scientific data analysis.
Choosing the Right Compression Type
When deciding between lossy and lossless compression, it boils down to your specific needs:
-
Use Lossy Compression for efficient sharing on platforms like YouTube, balancing file size reduction and acceptable playback quality.
-
Choose Lossless Compression when preserving every detail is non-negotiable, like in professional video editing or medical applications.
Understanding these two types sets the stage for our journey into the practical methods of compressing videos without compromising their visual integrity. Ready to explore the techniques? Let's dive in!
Top 5 Compression Methods for Video Editing
We're about to explore five practical methods that will help you compress your videos and significantly reduce their size. Whether you're on Windows, Mac, iOS, or Android, these techniques have you covered.
1. How to Compress your Video with Zipping
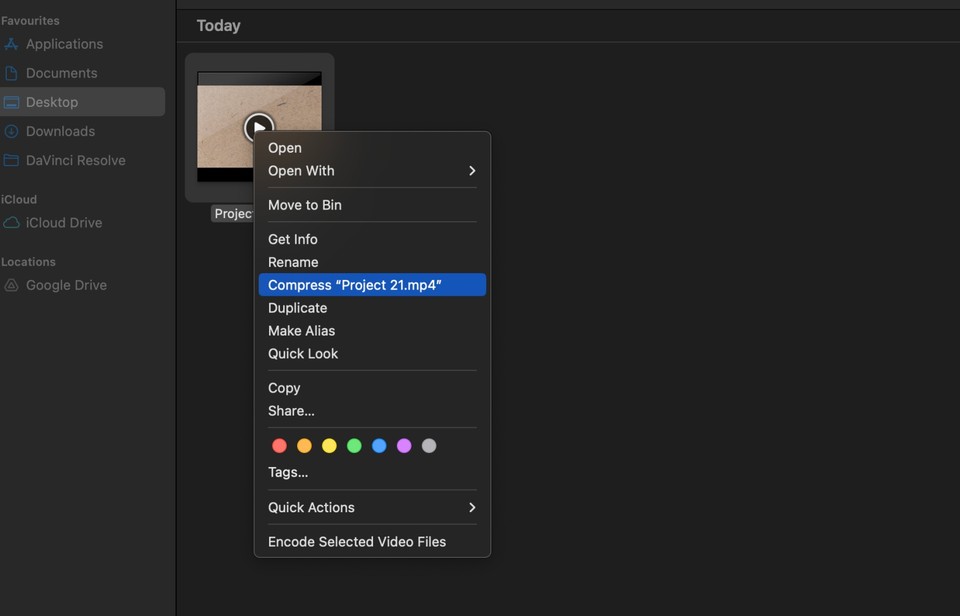
If you're looking for quick and easy compression, consider zipping your video or changing the file type. On Windows, right-click on your file and select "Send to > Compressed (zipped) folder." For MacOS users, right-click on the file and choose "Compress [file name]."
-
Ease of Use: Right-click and compress (zipped) folder on Windows, or use the "Compress" option on Mac.
-
Ideal for: Quick compression when sharing via email.
2. How to Compress your Video by Trimming
Shortening the overall runtime of your video by trimming unwanted sections is a clever way to reduce file size.
-
Effectiveness: Cutting out unnecessary parts reduces file size.
-
Tools: Use built-in video editors like Windows Video Editor, iMovie, or Quicktime on Mac.
3. How to Compress your Video by Changing Video Resolution
Tailor your video resolution to its intended platform for maximum impact. Whether it's YouTube, social media, or mobile devices, adjusting the resolution can significantly decrease file size. Import your video into editing software, access resolution settings, lower it based on the platform's requirements, and then export and save.
-
Why it Works: Lowering resolution decreases file size while balancing acceptable quality.
-
Scenarios: Optimize for online streaming, mobile devices, or social media.
4. How to Compress your Video by Transforming Video File Type
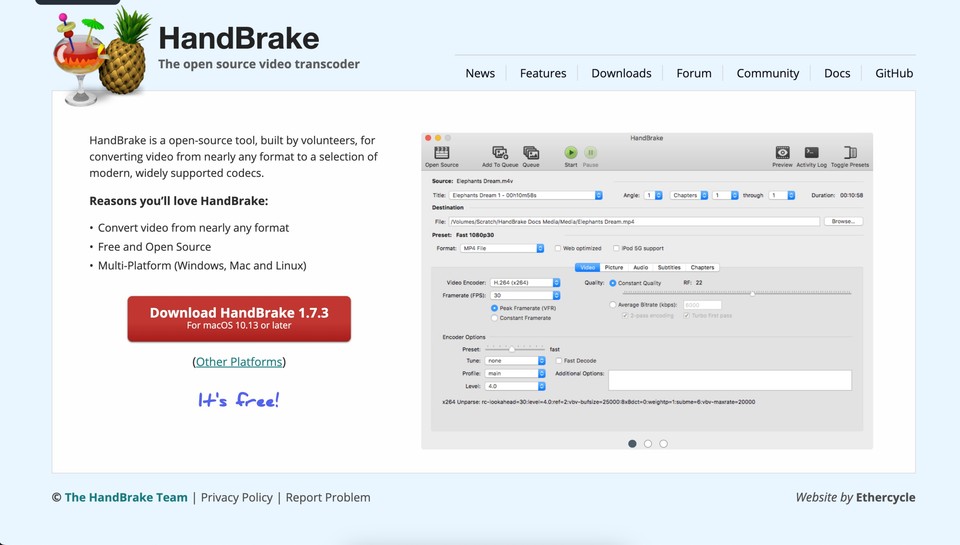
You can transform your video into a more compressed format. Popular choices include the MP4 with the H.265 (HEVC) codec, known for high compression and excellent video quality. This can be done seamlessly using different tools like Handbrake or iMovie. Import your video, choose the new format and codec, and save the compressed video to witness a noticeable reduction in file size.
-
Software Options: Utilize converters like HandBrake, FFmpeg, or Any Video Converter.
-
Formats for Better Compression: H.264 (MP4), H.265 (HEVC), WebM.
5. How to Compress your Video by Using an Online Video Compressor
For a hassle-free approach, consider online video compressor services. Upload your video, choose compression settings, and download the optimized video. This method is perfect for those who prefer a straightforward solution without the need for extensive video editing software.
-
Platforms: Try user-friendly online tools like Clipchamp, WonderShare UniConverter, or FreeConvert.
-
Adjustable Settings: Tweak quality, resolution, bitrate, and format for customized compression.
w
Reviewing Your Compressed Video
Remember, the goal is a smaller file size without sacrificing quality. Always playback and review your compressed video to ensure it meets your requirements. Once satisfied, feel free to free up storage space by deleting the original, larger file.
These methods are your toolkit for efficient video compression. Now, let's move forward and delve into the nitty-gritty of video resolution and compression settings. Ready for the next step? Let's roll!
Video Compression in Practice
We've covered the basics; now it's time to get hands-on with video compression in action. Let's explore the key elements and practical steps to ensure your videos are not only compressed but also optimized for your specific needs.
1. Understanding Video Codecs: The Backbone of Compression
-
Codec Definition: A codec decides how to compress and decompress your video. Video codecs use various algorithms to compress video data by removing redundant or unnecessary information while maintaining an acceptable level of video quality.
-
Choosing Wisely: Select the right video codec to ensure optimal compression for your content. Standard video codecs include H.264, H.265 (HEVC), VP9, and AV1, each with its own compression techniques and performance characteristics.
2. Factors Contributing to Large File Sizes
-
Video Resolution: Higher resolutions mean more pixels, translating to larger file sizes.
-
Bitrate: The amount of data transferred per second – higher bitrates mean better quality but larger files.
-
Encoding Method: The process of compressing videos into specific file types, like AVI, MOV, or MP4.
3. Choosing the Right Video Codec
-
Container vs. Codec: Understand the difference between the file format (container) and the compression method (codec).
-
Efficient Codecs: H.264 (MP4), H.265 (HEVC), and WebM are popular for good compression with maintained quality.
By comprehending the role of codecs and the factors influencing file sizes, you're equipped to make informed decisions. Now, let's navigate through the practical steps of video compression settings.
4. Practical Steps for Video Compression Settings
-
Resolution Settings: Adjust based on your audience's viewing habits (online streaming, mobile, or social media).
-
Bitrate Adjustment: Find the sweet spot – balance quality and file size. Start with 8 Mbps for 1080p and 5 Mbps for 720p.
-
Variable Bitrate (VBR): Opt for VBR to balance video quality and file size.
-
Encoding Pass: If available, choose 2-pass encoding for improved video quality.
Now that you're armed with these practical tips, you can optimize your videos for the perfect balance between quality and size.
Conclusion
In the world of online sharing, videos rule the game. We've seen that compressing these videos is like a superpower. It's not just about making them smaller but about making them work better. As we explored the ins and outs of video compression, you've learned the secrets to get the best out of your videos without losing quality.
Think of it like finding a sweet spot – not too big, not too small. By following the tips here, you're not just shrinking your videos; you're making them faster to upload, smoother to watch, and overall, more enjoyable.
As you go ahead and use these tricks, keep in mind it's not just about making videos smaller. It's about making them better. Your compressed videos are now nimble, ready to go anywhere online, reaching people on different devices and platforms.
In the busy online world, where everyone's fighting for attention, your skill at video compression is your secret weapon. So, go on, armed with what you've learned here, and let your compressed videos be the spark for a more exciting, shareable, and memorable digital journey. Happy compressing!