Introduction
Did you know that 500 hours of video content gets uploaded to YouTube every minute? In the time it takes to make a cup of coffee, hundreds of hours of content find their way onto the world's largest video-sharing platform.
With such an immense influx of videos, you might wonder how to make yours stand out in this vast digital sea. That's where this guide comes in. Welcome to your roadmap for how to upload a video to YouTube. Also, learn about optimizing your content and capturing the attention of your target audience.
In this blog, we'll break down the steps to upload a video to YouTube, demystify the technical aspects, and reveal the strategies to get your video on YouTube and help it shine amid the immense competition. So, whether you're a newcomer or a seasoned content creator, let's embark on this journey to make your videos truly remarkable in the ever-expanding universe of YouTube.
Before you upload: Video Size, Bitrates, and Optimization
When you upload videos to YouTube, several critical factors can significantly impact the success of your content. Understanding video size, bitrates, and optimization strategies is essential when you upload a video to YouTube.
Video Size Matters
-
Significance of Video Size: The size of your video affects both the viewing experience and how quickly it loads for your audience. Optimizing video size ensures smooth playback and minimizes buffering.
-
Recommended Video Sizes: YouTube offers specific recommendations for video resolutions based on aspect ratios. These recommendations help maintain optimal quality and ensure compatibility with various devices.
-
Standard 16:9 Aspect Ratio: Consider encoding your videos at these resolutions for the best results:
-
4320p (8k): 7680x4320
-
2160p (4K): 3840x2160
-
1440p (2K): 2560x1440
-
1080p (Full HD): 1920x1080
-
720p (HD): 1280x720
-
-
Importance of Resolution: Higher-resolution videos are more appealing, especially on larger screens. However, the resolution should align with the quality of your source footage.
Bitrates for Quality Playback
-
Understanding Bitrates: Bitrate refers to your video's data processed per second. It directly impacts video quality. A higher bitrate generally results in better video quality but larger file sizes.
-
Recommended Video Bitrates: YouTube provides guidelines for video bitrates to ensure your content looks its best. These recommendations vary based on the video's resolution and frame rate.
-
For example, for 1080p video, YouTube recommends a bitrate of 8 Mbps for standard frame rates and 12 Mbps for high frame rates.
-
Matching the bitrate with your chosen resolution and frame rate is essential to maintain quality.
-
Thumbnails
-
The Power of Thumbnails: Thumbnails are the first thing viewers see after you upload videos to YouTube. A compelling thumbnail can significantly impact whether someone clicks on your video.
-
Creating Eye-Catching Thumbnails: Craft thumbnails that are visually appealing and relevant to your content. Consider using high-resolution images and adding text or graphics that tease the video's content without giving it all away.
💡 Pro Tip: Use an AI thumbnail maker to create eye-catching thumbnails for your YouTube videos.
Titles, Descriptions, and Tags
-
Titles: Your video's title is critical for searchability and audience engagement. Craft titles that are concise, descriptive, and incorporate relevant keywords. Titles are your video's first impression on searchers.
-
Descriptions: The video description provides additional context and information. Use it to summarize your video's content, include relevant keywords, and add links to related content or resources. A well-optimized description can improve discoverability.
-
Tags: Tags are like keywords that help YouTube understand your video's content. Use them to add relevant terms and phrases that people might use when searching for content like yours. Well-chosen tags can boost your video's visibility.
Optimizing video size, bitrates, and thumbnails, and crafting compelling titles, descriptions, and tags are crucial to ensuring your videos shine when you upload videos to YouTube. These elements enhance the viewing experience and increase your video's discoverability and engagement with your audience. In the sections ahead, we'll delve deeper into each aspect to help you master the art of successful video uploading on YouTube.
How to upload a video to YouTube?
Now that your video is ready, it's time to navigate to the question - how to upload a video to YouTube? This section will guide you through every step to upload videos to YouTube, from crafting a compelling video title to adding tags that help discover your content. Let's get started!
Step 1: Uploading the Video
-
Access YouTube: Open your web browser and go to the YouTube website. If you still need to be signed in, click the Sign In button at the top right and enter your Google account credentials.
-
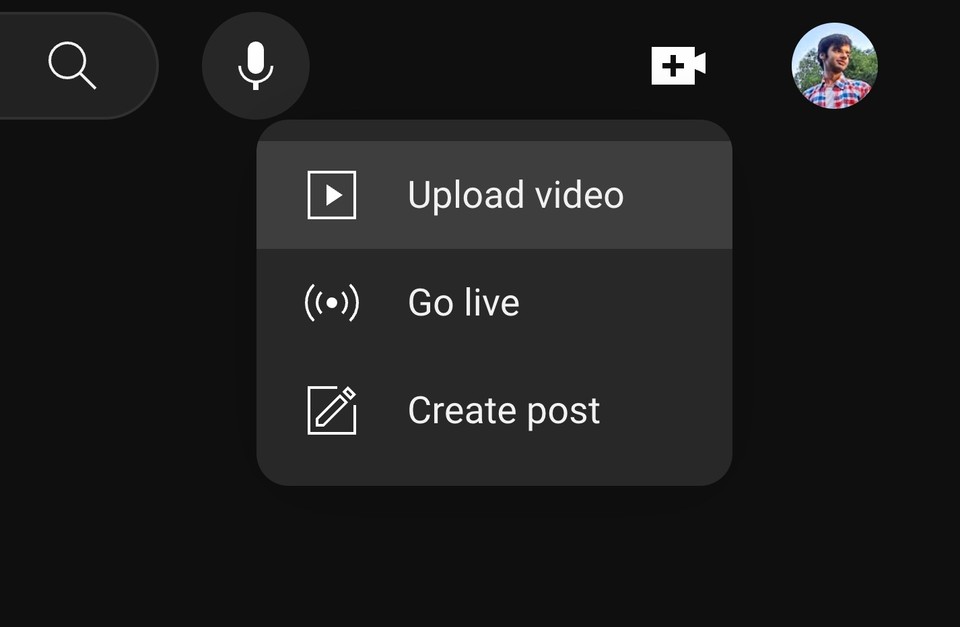
Access the Upload Page: Click the camera icon in the upper-right corner. From the drop-down menu, select "Upload a video"
-
Choose Your Video: You can drag and drop your video file into the pop-up menu or click "Select Files" to locate and choose the video file on your computer.
Step 2: Crafting an Engaging Video Title
-
Title Basics: Your video title is like the cover of a book - it should grab attention and provide a glimpse of what's inside. Make it engaging and descriptive.
-
Keywords Matter: Include relevant keywords in your title. Keywords are words or phrases people might use when searching for content like yours. For example, if your video is a cooking tutorial, include terms like "easy recipe" or "cooking tips."
-
Be Specific: Be specific but concise. Tell viewers exactly what they will get from your video.
Step 3: Crafting the Video Description
-
Description Importance: Your video description is your chance to provide more context about your video's content. It helps both viewers and search engines understand what your video is about.
-
Use Keywords: Incorporate keywords naturally in your description. Explain what your video covers and why it's valuable to the viewer. Use the first few sentences wisely, as they appear in search results.
-
Include Links: If you have related content or resources, including links in the description. It can keep viewers engaged with your channel.
Step 4: Adding Relevant Video Tags
-
Understanding Tags: Video tags are keywords and phrases that help YouTube categorize your content. They play a vital role in searchability.
-
Choose Wisely: Select tags that accurately represent your video's content. For example, use tags like "recipe," "cooking tips," or specific ingredients for a cooking tutorial.
-
Use Synonyms: Don't forget synonyms or related terms. If your video is about "baking cookies," consider tags like "cookie recipes" or "baking desserts."
Step 5: Creating a Compelling Thumbnail
-
Gateway to video: Thumbnails are your video's visual ambassadors. Create a captivating one that reflects your content accurately.
-
Use High-Quality Images: Ensure your thumbnail image is clear and high-resolution.
-
Text and Graphics: Add text or graphics to your thumbnail that provide a sneak peek of your video's content.
Step 6: Category Selection
-
Category Matters: Choose a category that best fits your video's content. It helps YouTube recommend your video to the right audience.
-
Educational Categories: If your video falls into an educational category, specify the type, level, and relevant topics for better discoverability.
-
Age-Appropriateness: Indicate whether your video is suitable for children or adults. It is essential for compliance with online privacy regulations.
Step 7: Language and Captions
-
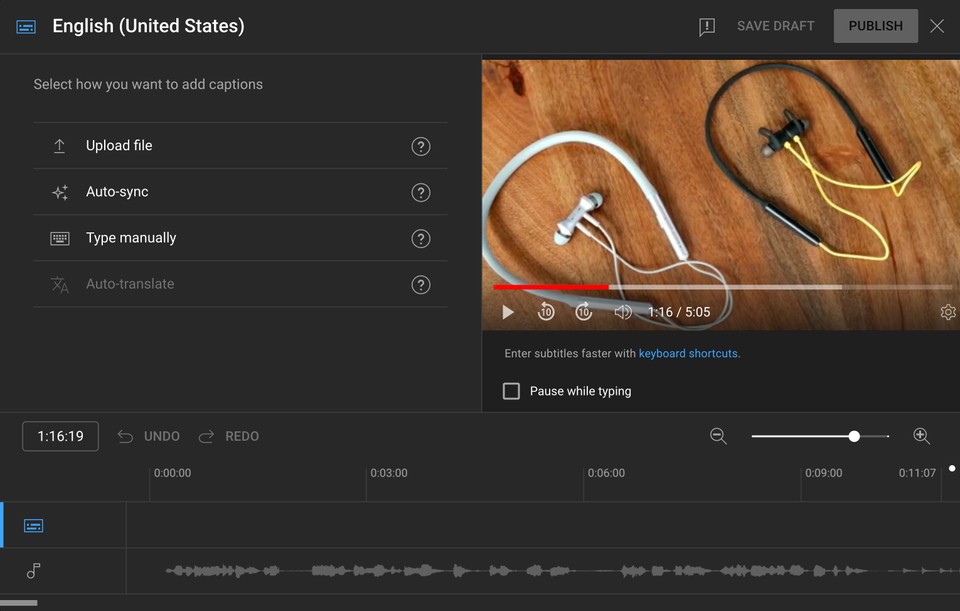
Language Selection: Choose the original language of your video.
-
Captions: YouTube offers automatic captioning, but for the most accurate and high-quality captions, consider manually adding them. You can use YouTube's captioning tools or upload your caption file.
Step 8: Video Elements and Visibility Settings
-
Enhance Engagement: Add cards, end screens, and subtitles to engage your audience further.
-
Privacy Options: Decide when you want your video to publish (immediately, scheduled, or private).
-
Audience Settings: Determine who can find your video. Public, unlisted, or private options are available.
Post-Processes: Preview and Analytics
Now that your video is uploaded, there are a few post-upload actions to take to ensure it looks its best and performs well. Let's dive into these essential post-upload steps in newbie-friendly terms.
Checking the Video Preview
-
Video Quality Explanation: When you first upload a video, YouTube may initially display it in 480p quality. It's because the platform is still processing your video for higher resolutions.
-
Waiting for Higher Resolution: Don't worry if your video doesn't immediately show in high definition. It takes time for YouTube's systems to process and make higher resolutions available. Be patient, as your viewers will eventually be able to watch in the best quality.
Utilizing Analytics
-
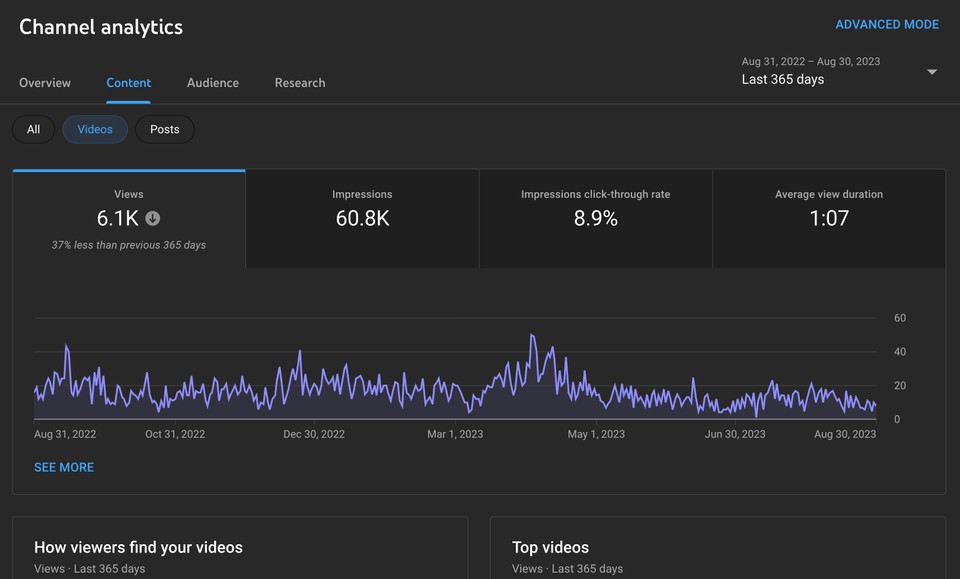
Understanding Analytics: Analytics are like a treasure trove of information about your video's performance. You can access them by going to your YouTube Studio.
-
What to Monitor: Keep an eye on critical metrics like views, watch time, average view duration, audience demographics, and engagement (likes, comments, shares). These numbers can tell you how well your video is doing and what your viewers like.
-
Making Informed Decisions: Use the insights from analytics to make critical decisions about your content strategy. For example, if viewers drop off halfway through your videos, consider making them shorter or more engaging.
-
Audience Engagement: Pay attention to comments and feedback from your viewers. Engage with your audience through community posts, livestreams, and fostering community around your channel.
By checking the video preview and utilizing analytics, you're taking significant steps to ensure your video looks fantastic and connects with your audience effectively. These post-upload processes will help you refine your content and continue growing your YouTube channel.
Bonus Strategy: Linking Videos in Shorts and Live Content
YouTube is continuously evolving, and as of August 17, 2023, it has introduced an exciting new feature that allows you to enhance how viewers engage with your content.
YouTube now allows you to edit your Shorts and Live content to include a link to another video from your channel. This link will be visible in the Shorts player and Live content, providing a seamless way to direct viewers from one piece of your content to another.
This feature works for Videos, Shorts, and Live content, giving you flexibility across various content types.
Potential Benefits of Linking Videos
Linking your content within Shorts and Live content can offer several advantages:
-
Improved Viewer Engagement: Viewers can easily navigate from one video to another, promoting a longer watch time and deeper engagement with your content.
-
Promoting Related Content: You can strategically link videos related to the topic or theme of your Shorts or Live content. It helps you cross-promote your content and keep viewers interested in your channel.
-
Viewer Retention: By offering a seamless transition to another video, you increase the chances of viewers sticking around on your channel, watching more videos, and potentially subscribing.
-
Enhanced Visibility: Linking videos can also increase the platform's visibility. YouTube's algorithm rewards content that keeps viewers engaged and encourages them to watch more.
💡Pro Tip: YouTube shorts outperform long-form videos in terms of reach. You can easily leverage AI tools like Fliki to quickly create YouTube shorts and link them to your main videos.
Gradual Rollout and Accessibility
It's important to note that this feature rollout is gradual and may only be available to some channels or viewers. YouTube is likely testing and refining the feature to ensure a smooth experience for everyone.
How to Use the Linking Feature
To use this feature, follow these steps:
-
Go to the video you want to edit (Shorts or Live content).
-
Access the editing options.
-
Look for the "Link to Another Video" option.
-
Select the video you want to link to from your channel.
-
Save your changes.
By taking advantage of this new feature, you can enhance viewer engagement and create a more cohesive experience for your audience on YouTube. As the platform evolves, staying up-to-date with new features can help you grow and succeed as a content creator.
Next Steps: Learn about YouTube automation to take your YouTube game to the next level.
Conclusion
Congratulations! You've reached the end of our comprehensive guide, teaching you to upload videos to YouTube effectively and efficiently. We've covered every aspect of the process, from the technical details of video quality and settings to the art of optimizing your content for maximum visibility and engagement.
You can now share your creativity, knowledge, or entertainment with the vast YouTube audience. Remember, the journey doesn't end here. Creating, refining, and promoting your content is the key to success on this dynamic platform.
Stay updated and adapt your strategy as YouTube evolves and introduces new features. Monitor your video's performance using analytics, engage with your audience, and explore advanced features like linking videos in Shorts and Live content to foster viewer loyalty.