Convert a PowerPoint presentation to video
Fliki's PPT-to-Video workflow turns a static deck into a polished video with voiceover, visuals, captions, and an optional AI presenter. Upload your slides, choose how you want them turned into a video, then fine-tune the format, media, and narrator on a single-page builder before generating. Each slide becomes a scene, and speaker notes become narration.
Step 1 - Open the PPT to video workflow
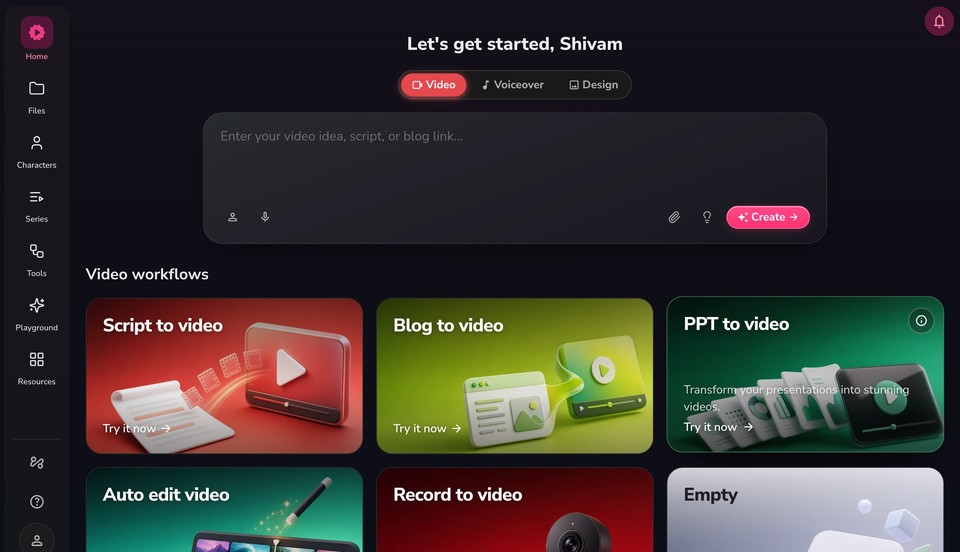
Open the Fliki homepage at app.fliki.ai.
Under Video workflows, click PPT to video (you can also enter a video idea, script, or blog link in the Create bar for other workflows).
Step 2 - Upload your deck
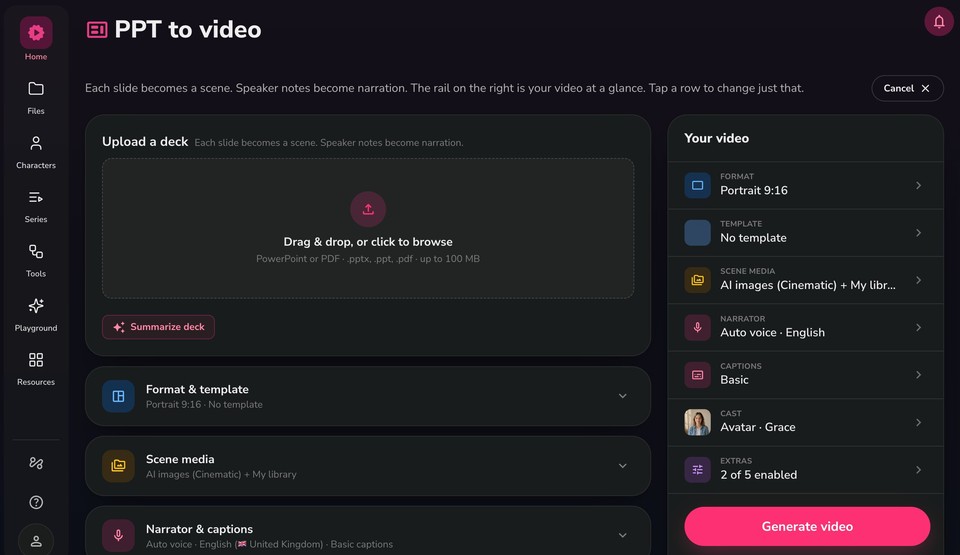
On the PPT to video page:
Drag and drop your deck into the Upload a deck area, or click to browse.
Supported formats are PowerPoint and PDF (.pptx, .ppt, .pdf), up to 100 MB.
Remember: each slide becomes a scene, and speaker notes become narration. The rail on the right ("Your video") summarizes every setting at a glance, and you can tap any row to change just that part.
Step 3 - Choose how to turn your deck into a video
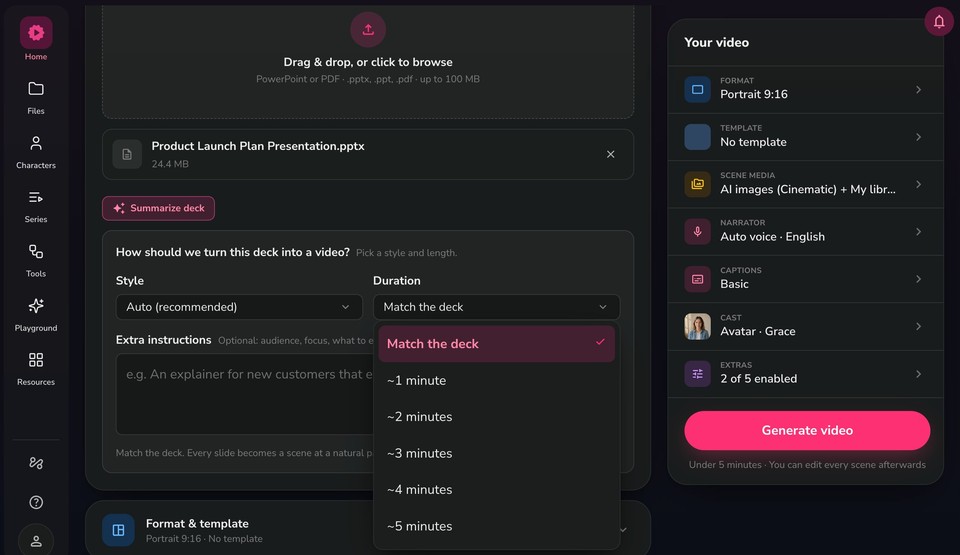
Once your deck is uploaded, its file name and size appear. Now set how Fliki adapts it:
Summarize deck (optional) - Click to have Fliki summarize the deck's content before building the video.
Style - Choose how the video is written. Auto (recommended) lets Fliki pick the best approach.
Duration - Choose Match the deck so every slide becomes a scene at a natural pace, or pick a target length (~1 to ~5 minutes) to condense the content.
Extra instructions (optional) - Add guidance such as the audience, the focus, or what to emphasize (for example, "An explainer for new customers").
Step 4 - Set the format and template
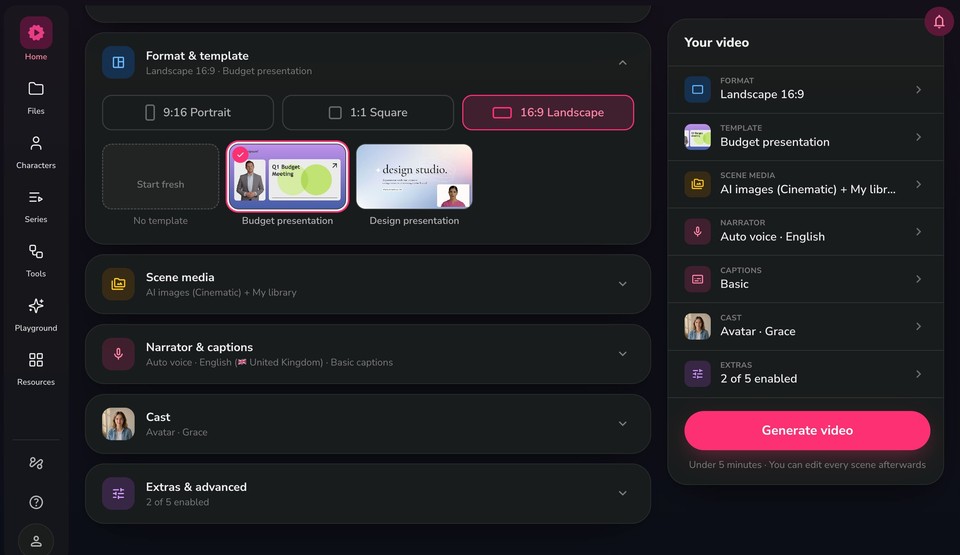
Open Format & template from the rail to set:
Aspect ratio - 9:16 Portrait, 1:1 Square, or 16:9 Landscape (Landscape works well for most presentations).
Template - Choose a presentation template such as Budget presentation or Design presentation to keep a consistent slide-style look, or select Start fresh (No template).
Step 5 - Choose your scene media
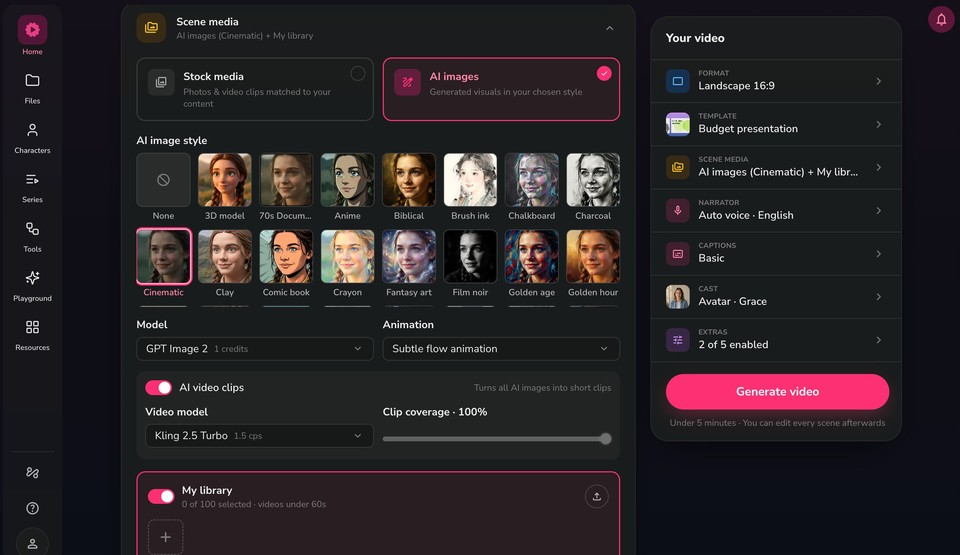
Open Scene media to control the visuals that accompany your slides:
Stock media - Photos and video clips matched to your content.
AI images - Generated visuals in a style you pick from the gallery (Cinematic, 3D model, Anime, Comic book, Film noir, Golden hour, and more).
When AI images are selected, set the Model (for example, GPT Image 2) and an Animation style such as Subtle flow animation.
Turn on AI video clips to convert AI images into short moving clips, then choose a Video model (for example, Kling 2.5 Turbo) and set the Clip coverage percentage.
Enable My library to include your own uploaded images and clips.
Step 6 - Set the narrator and captions
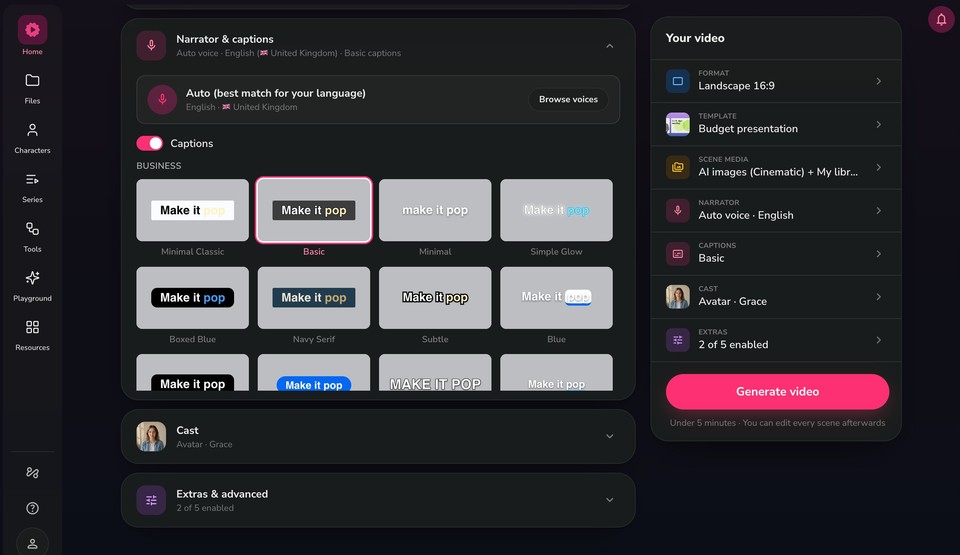
Open Narrator & captions:
Keep Auto (best match for your language) or click Browse voices to choose a specific voice, language, and dialect.
Toggle Captions on or off, then pick a style from the gallery (grouped into sets like Business and Social), for example Minimal Classic, Basic, Simple Glow, or Boxed Blue.
Step 7 - Confirm your cast
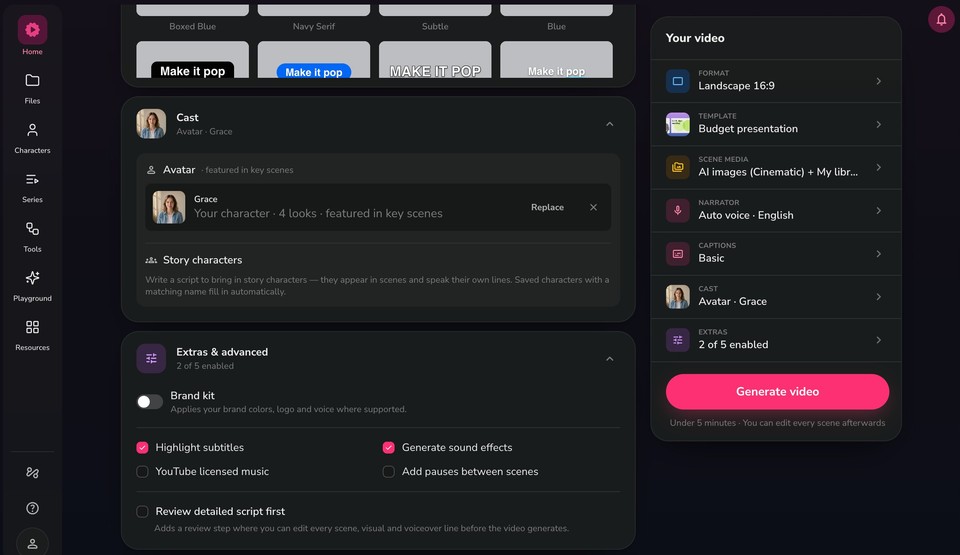
Open Cast to add an on-screen presenter:
Under Avatar, choose a presenter featured in key scenes (for example, Grace with 4 looks). Use Replace to swap them or the X to remove.
Story characters appear automatically when your script brings in named characters. Saved characters with a matching name fill in on their own.
Step 8 - Adjust extras and advanced options
Open Extras & advanced to enable optional features:
Brand kit - Applies your brand colors, logo, and voice where supported.
Highlight subtitles, Generate sound effects, YouTube licensed music, and Add pauses between scenes.
Review detailed script first - Adds a review step where you can edit every scene, visual, and voiceover line before the video generates.
Step 9 - Generate your video
Click Generate video. Generation usually takes under 5 minutes, and you can edit every scene afterward. Fliki works through each stage: Preparing, Analyzing the script, Building the scenes, Generating the visuals, Adding voice & music, and Finalizing. You can keep the tab open while it works.
Step 10 - Edit, preview, and download
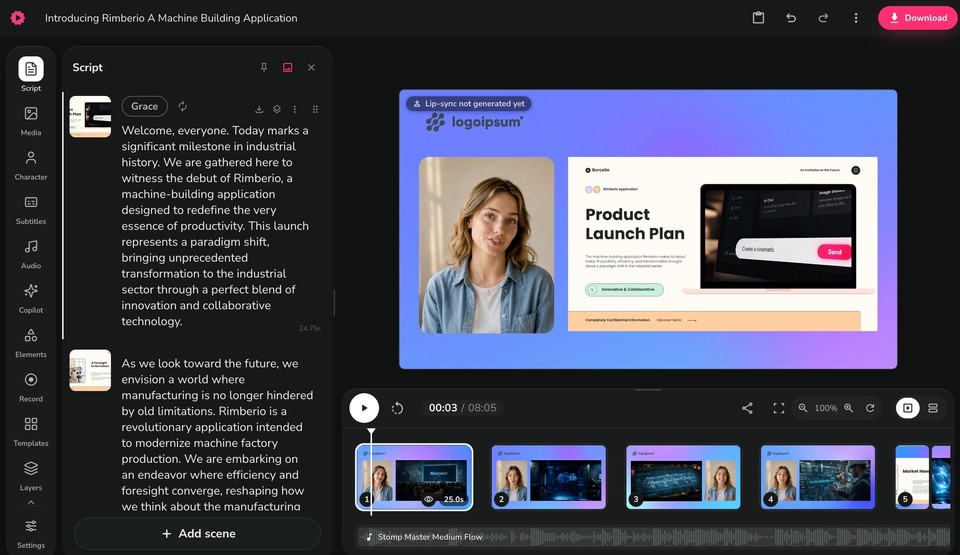
When generation completes, your video opens in the editor:
The left panel lists every scene and line of narration, and the center shows a live preview of your slides with the avatar.
Use the left sidebar to fine-tune Script, Media, Character, Subtitles, Audio, Elements, and more.
If you added an avatar, you may see a "Lip-sync not generated yet" note. Generate lip-sync from the character options when you want the avatar's mouth movements matched to the narration.
Play back the video, adjust any scene, then click Download to export as an MP4. You can also download subtitles in your preferred format.
With Fliki's PPT-to-Video workflow, transforming static slides into captivating videos has never been easier.
FAQs
Yes, it's possible to convert a PowerPoint presentation into a video with Fliki. Fliki streamlines the process, enabling users to create engaging videos from their presentations in less than a minute.
To convert a PPT to a video using Fliki, upload the presentation to Fliki and customize the voiceover, background music, avatar, and other layers as needed. Finally, click "Download" to export the video in MP4 format.