Convert Your Script into a Stunning Video
Turn your written content into visually engaging videos with Fliki’s Script-to-Video workflow. Whether it’s a marketing script, an educational guide, or a story, Fliki makes it easy to bring your words to life.
Step 1 - Create a video file
-
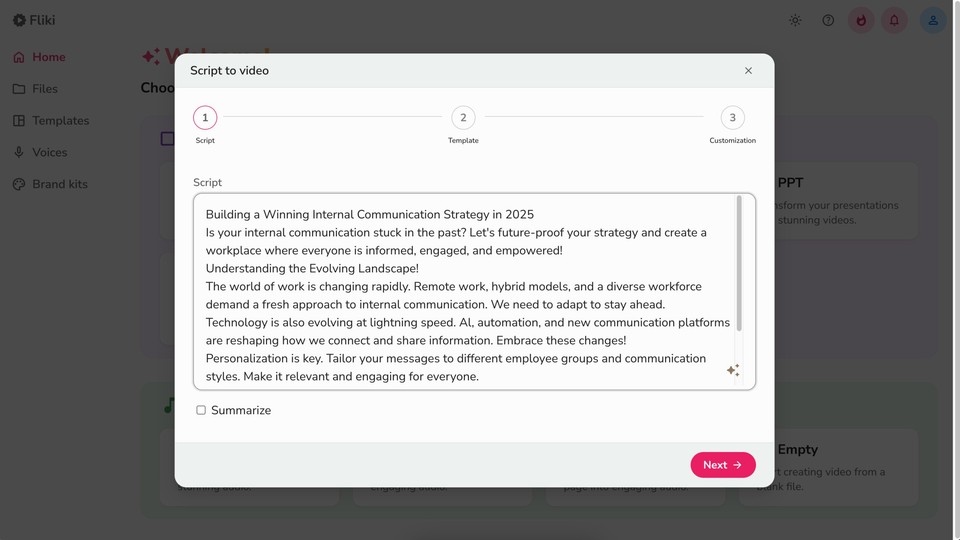
Select the Script option under the video section.
-
In the script box, write or paste your script.
-
Check the Summarize option if you want Fliki to generate a condensed version of your script.
-
Click Next to continue.
Step 2 - Select aspect ratio & template
-
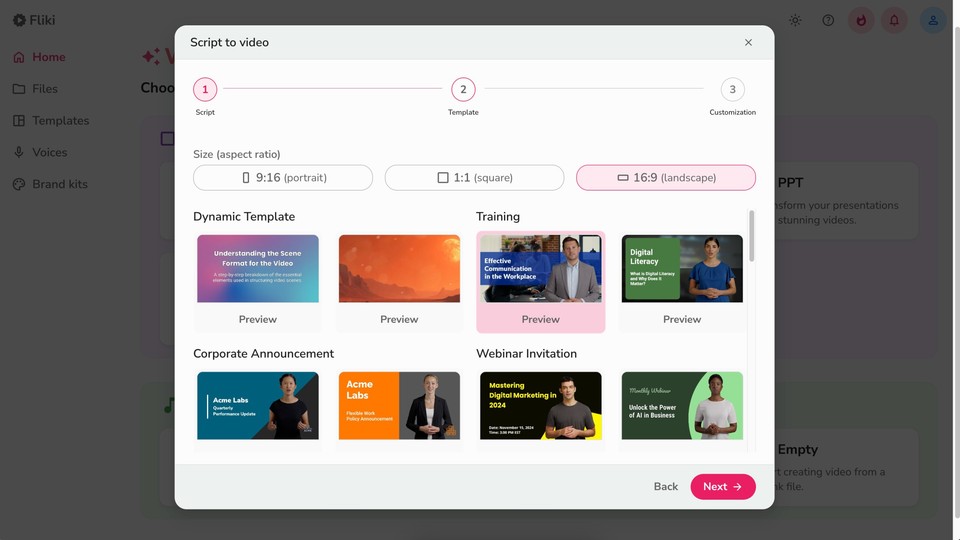
Choose from landscape, portrait, or square aspect ratios.
-
Select a video template that best fits your content.
-
Alternatively, select Auto Layout to let AI generate unique layouts for you.
-
Click Next to proceed.
Step 3 - Choose personalization options
Select language and dialect
-
Choose from 80+ languages and 100+ dialects.
-
Customize the tone, purpose, and audience for a more personalized video experience.
-
Click Next once satisfied.
Select media type
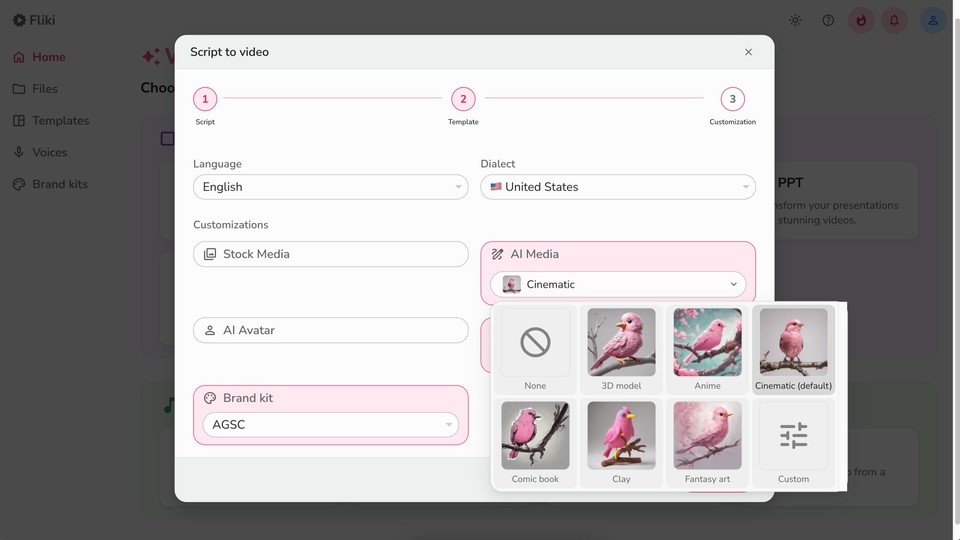
Choose between:
-
Stock media
-
AI media
If selecting AI media, choose from styles like: 3D Model, Anime, Cinematic, Comic Book, etc.
Step 4 - Customize AI avatar & voiceover
Select AI avatar
-
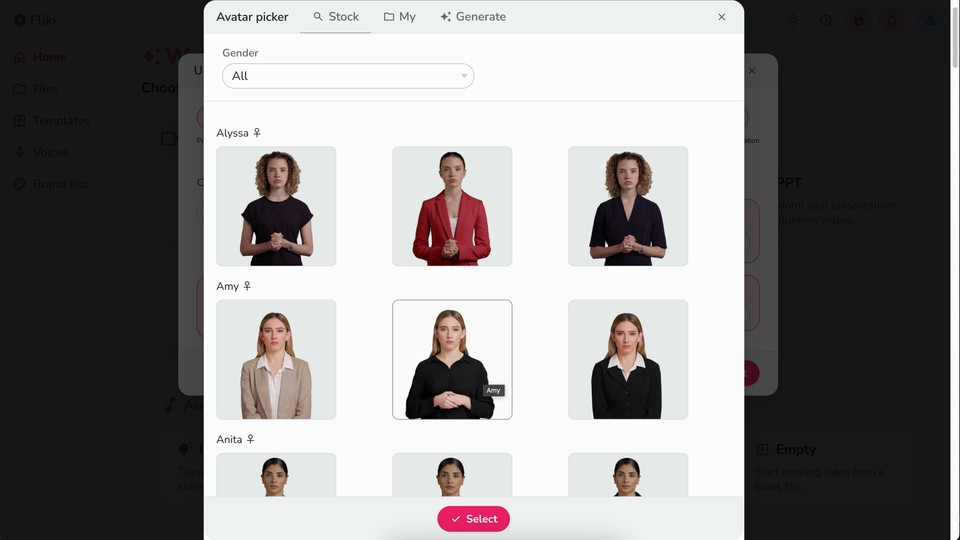
Click on the Avatar icon.
-
Filter avatars by gender.
-
Hover over an avatar to preview it.
-
Double-click to select your preferred avatar.
Select AI voiceover
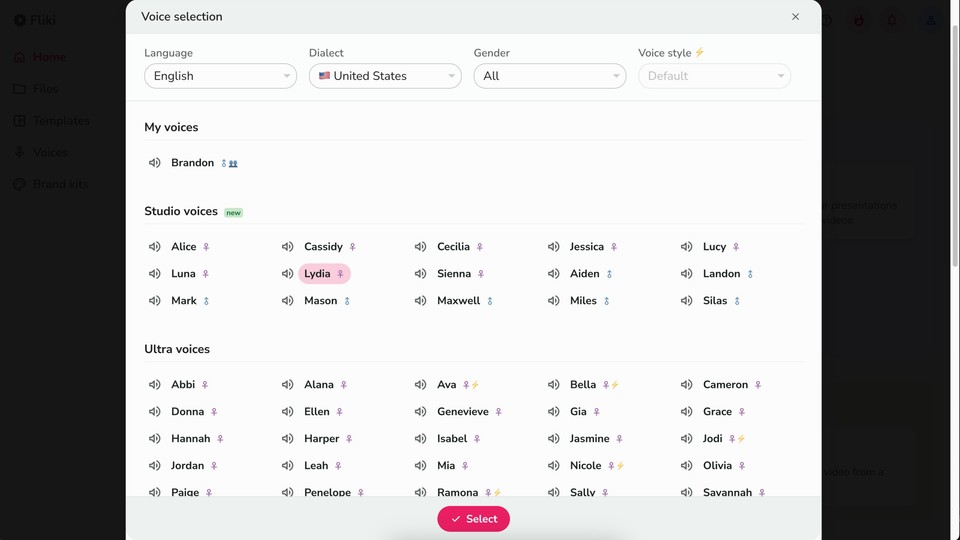
-
Click on the voice name.
-
Filter voices by language, dialect, and gender.
-
Click the speaker icon to listen to voice samples.
-
Double-click to select a voice.
-
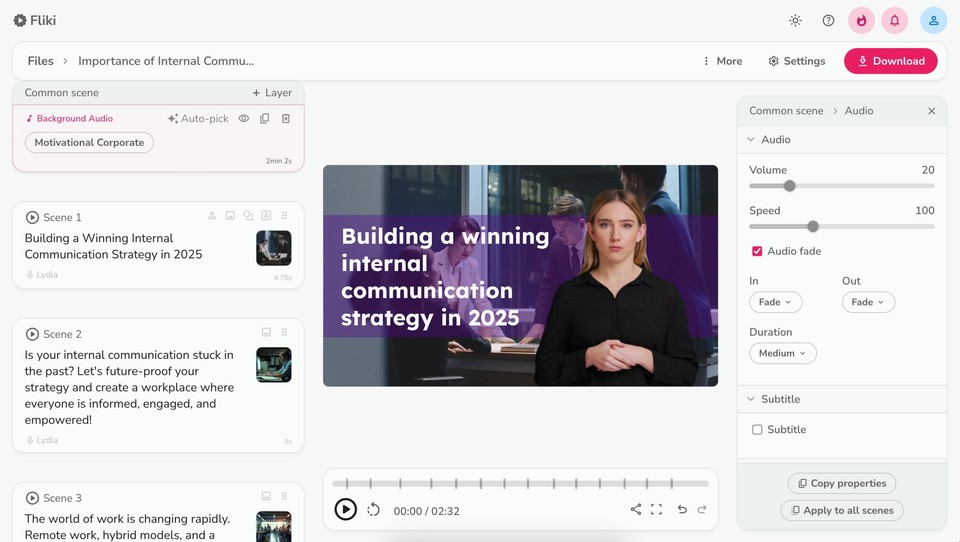
Click Submit to finalize. Fliki will generate a video based on your script and preferences.
Step 5 - Customize background music & watermark
-
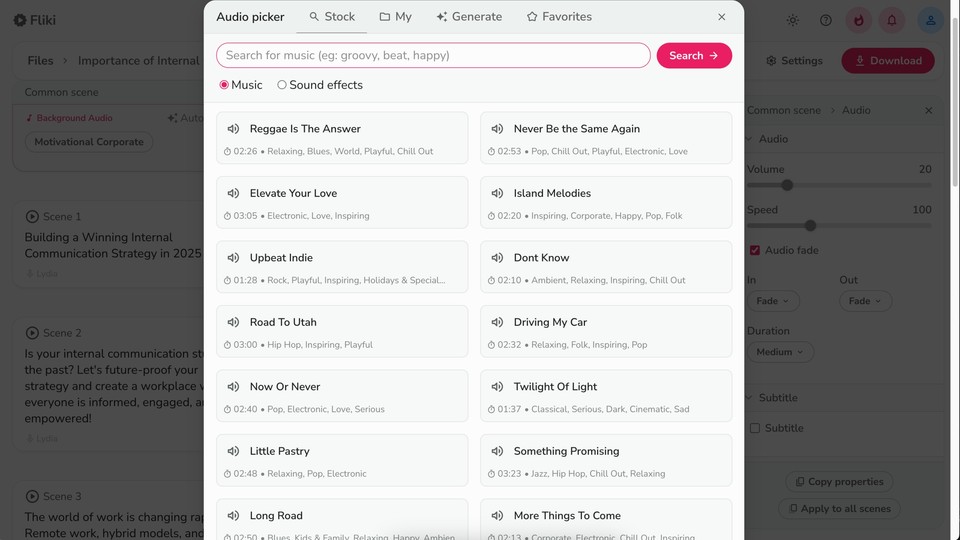
You can change the background music by clicking the music name in the background audio layer in common scene.
-
You can adjust volume and speed from the customization panel.
-
To add a watermark, go to Common Scene > Add Layer > Watermark.
-
Click Choose File to upload your brand logo or select a previously uploaded one.
-
Again, you can adjust the size, position, and opacity from the customization panel on the right.
Step 6 - Export & download video
-
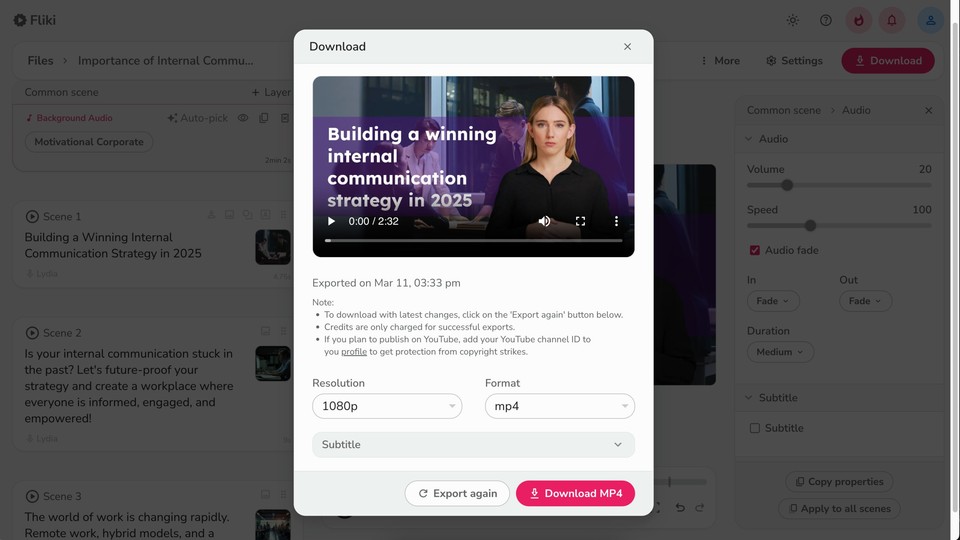
Click Download, then Start Export to save your video in MP4 format.
-
You can also download the subtitles in SRT or VTT format.
With Fliki’s Script-to-Video workflow, transforming your text into professional videos has never been easier.
FAQs
Yes, it's possible to convert text to video using AI video generator platforms like Fliki.
Fliki is an AI-powered platform that facilitates the conversion of text to video. It offers various customization options, including voice selection, avatar customization, text overlays, and background music, making it a versatile tool for generating captivating videos from text.
To make an AI video from text using Fliki, input your text content in the script tab and hit submit. Fliki will format it based on new lines and automatically add relevant media. Customize visuals using stock avatars, uploaded images, or AI-generated visuals. Add background music, preview the result, and then export the video once satisfied.
Fliki is an artificial intelligence website that specializes in converting text to video. With its AI-powered features and extensive customization options, Fliki enables users to create professional-quality videos from their text content quickly and easily.


