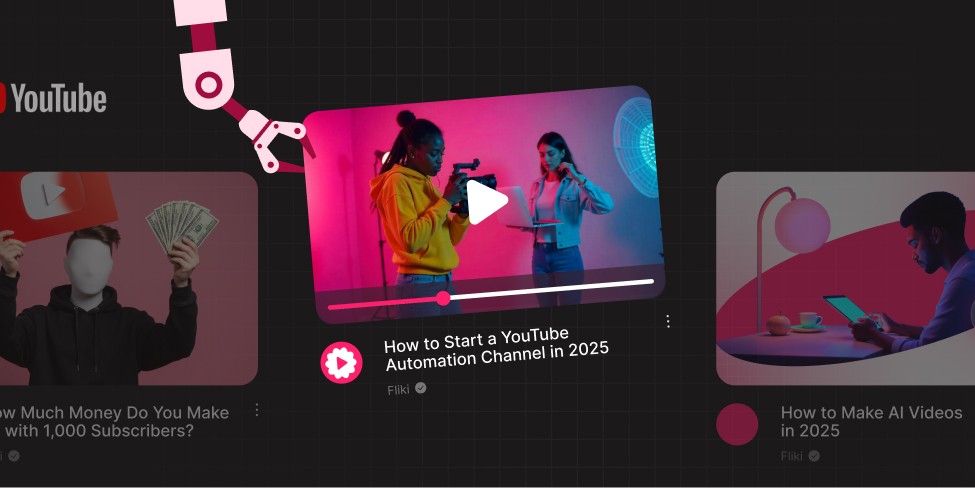
Introduction
Imagine dropping a single row into a spreadsheet and watching a fully edited video glide straight onto your YouTube channel while you sip coffee.
If that sounds like science fiction, hang on. By the end of this post you’ll have a no-code assembly line - powered by Zapier, Fliki, Google Sheets, and YouTube - that turns raw ideas into published videos on YouTube without you lifting a finger after the initial setup.

Why Automate Your YouTube Channel in 2025?
YouTube is currently the second-largest search engine and an endless content beast. Whether you’re a solopreneur, marketer, or teacher, consistent publishing wins the algorithm’s heart. Yet editing, voice-overs, and uploading still swallow hours.
YouTube Automation closes that gap by:
Saving time - A 5-minute spreadsheet update can replace a multi-hour editing session.
Scaling output - Publish daily without hiring a video team.
Reducing human error - Metadata, tags, and thumbnails are pulled directly from the sheet.
Staying creative - Focus on ideas; let robots handle the repetitive clicks.
YouTube Automation Tool Requirements: Zapier, Fliki, Google Sheets & YouTube
Tool | Role in the Workflow | Why It Matters |
|---|---|---|
Zapier | The conductor. Connects apps through “Zaps” (trigger ➜ action steps). | No-code, cloud-based, trustworthy. |
Google Sheets | The content database. Each row = one video project. | Familiar UI, easy data entry, free. |
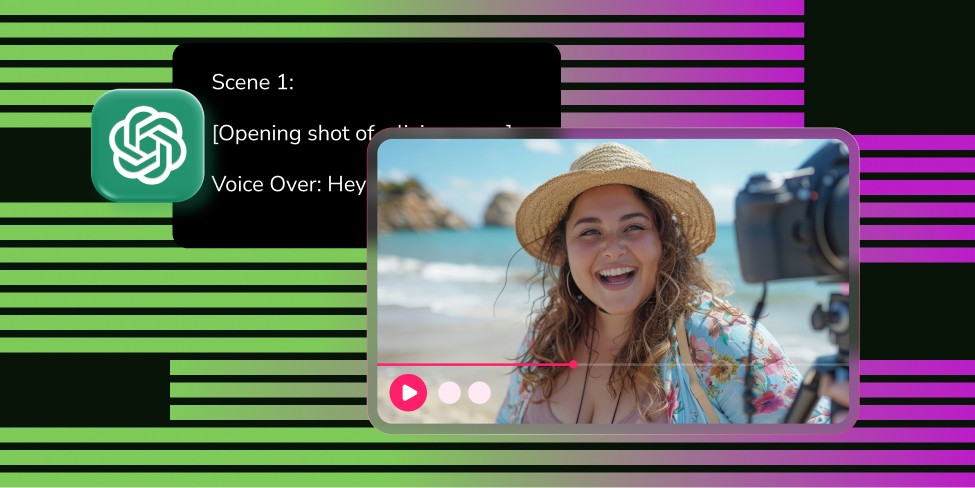
Fliki | AI video generator. Turns text prompts into voice-over videos fast. | High-quality AI voices, templates, also provides voice cloning and AI avatars. |
YouTube | Your stage. Zapier uploads the finished file directly. | Instant publishing & scheduling. |
Zapier’s new-ish multi-step builder and Fliki’s Zapier-native integration (still marked Beta as of May 2025) make the magic possible.
Building YouTube Automation Workflow
Prep Work: Designing Your Spreadsheet
Before touching Zapier, create a Sheet with one header row.
Here’s a minimalist template:
1 | 2 | |
|---|---|---|
A | Workflow Type | url |
B | Workflow Format | video |
C | Template ID | 6728f4ef1aa1dd3c0e100b82 |
D | Prompt | Create a video from this blog post |
E | Content | |
F | Duration | 3 |
G | Visual Type | ai |
H | Voice ID | 6349990e1237e257036a1263 |
I | Aspect Ratio | 16:9 |
J | Auto Export | True |
K | Export Resolution | 1080p |
L | Export File Extension | mp4 |
Note: The table has been displayed vertically to enhance readability. When there are many columns in the data, a horizontal table can become difficult to view on standard screens, requiring excessive horizontal scrolling. Therefore, we’ve displayed it vertically.
💡 Tip: Find template IDs and voice IDs in Fliki’s template resources and voice resources respectively.
Part 1 - Build the Trigger (Google Sheets → Zapier)
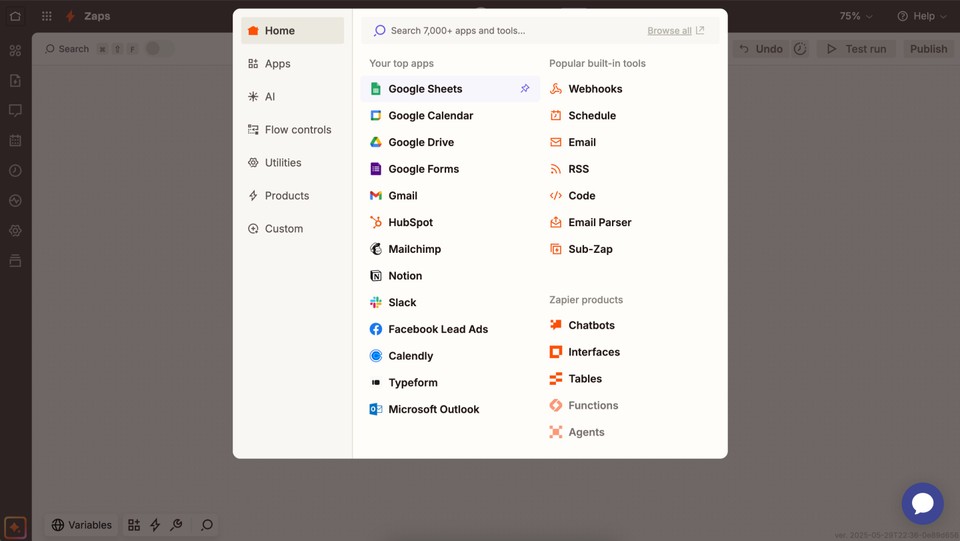
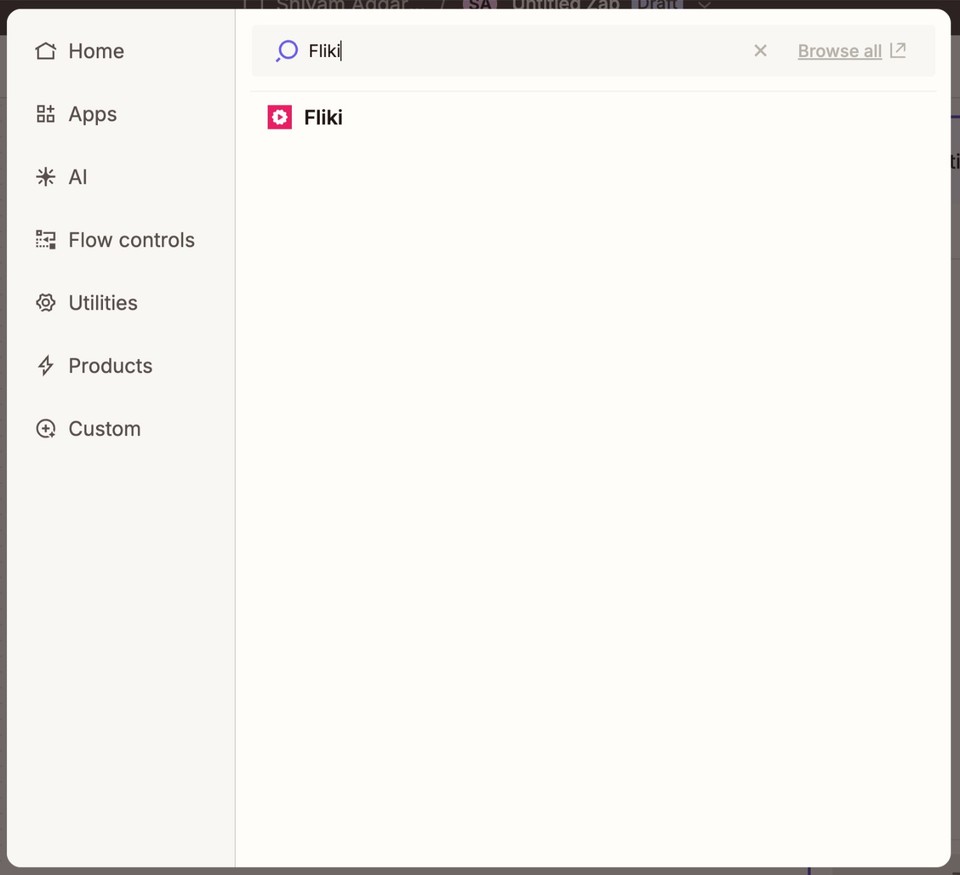
Log in to Zapier and hit “+ Create Zap.”
This will take you to the workflow editor.
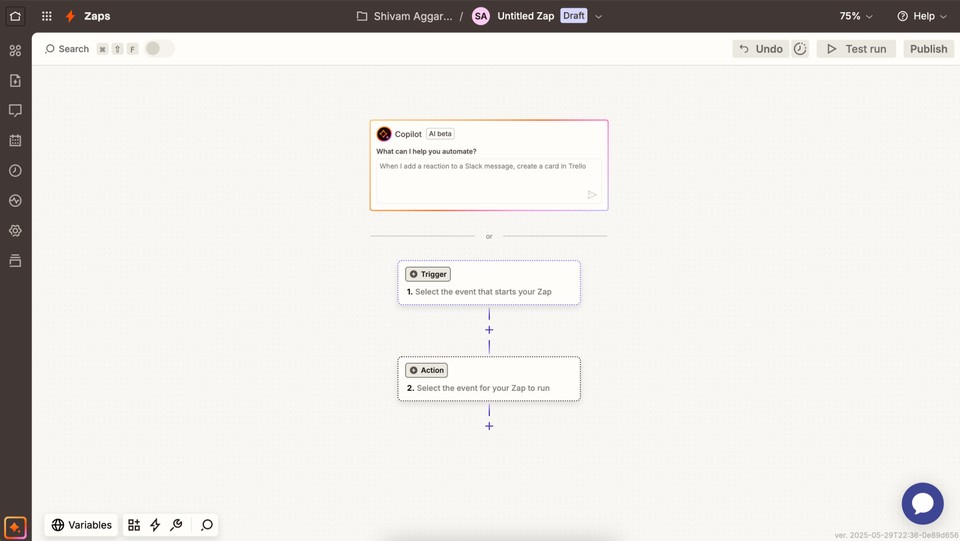
Click on Trigger and Search for Trigger App: Google Sheets
Add Trigger Event: New Spreadsheet Row
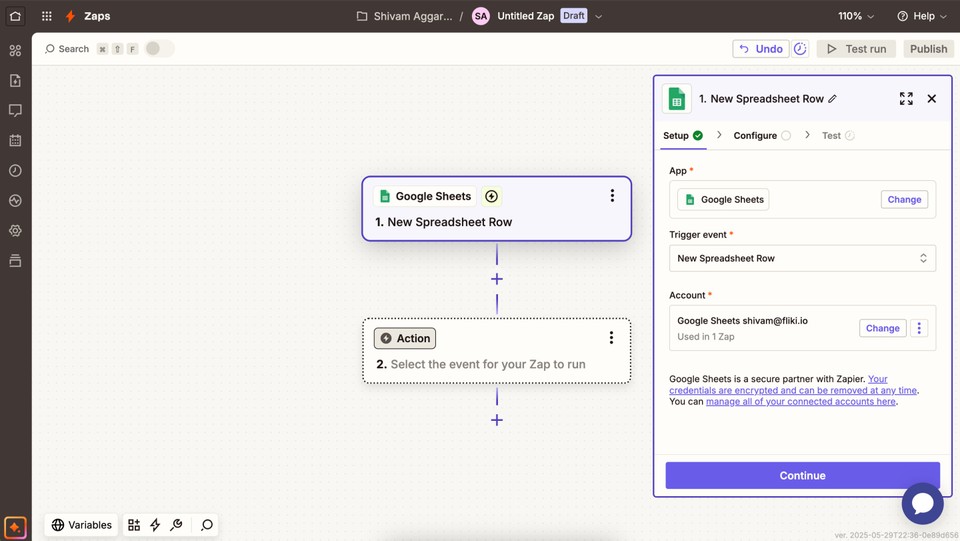
Connect Google Account: OAuth your Google credentials.
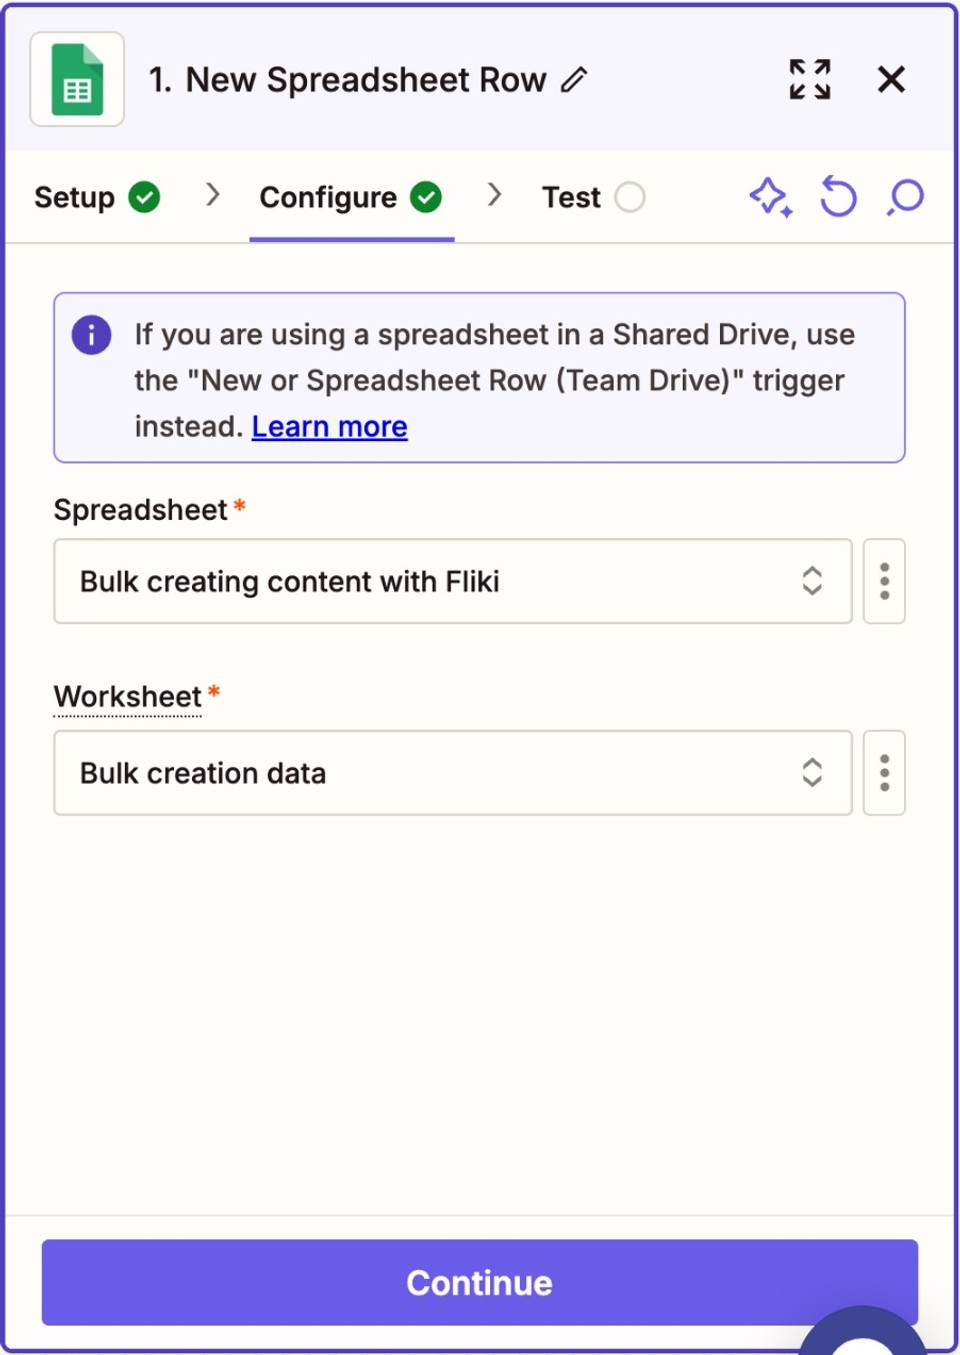
Configure:
Spreadsheet: Select your file.
Worksheet: Choose the tab with headers.
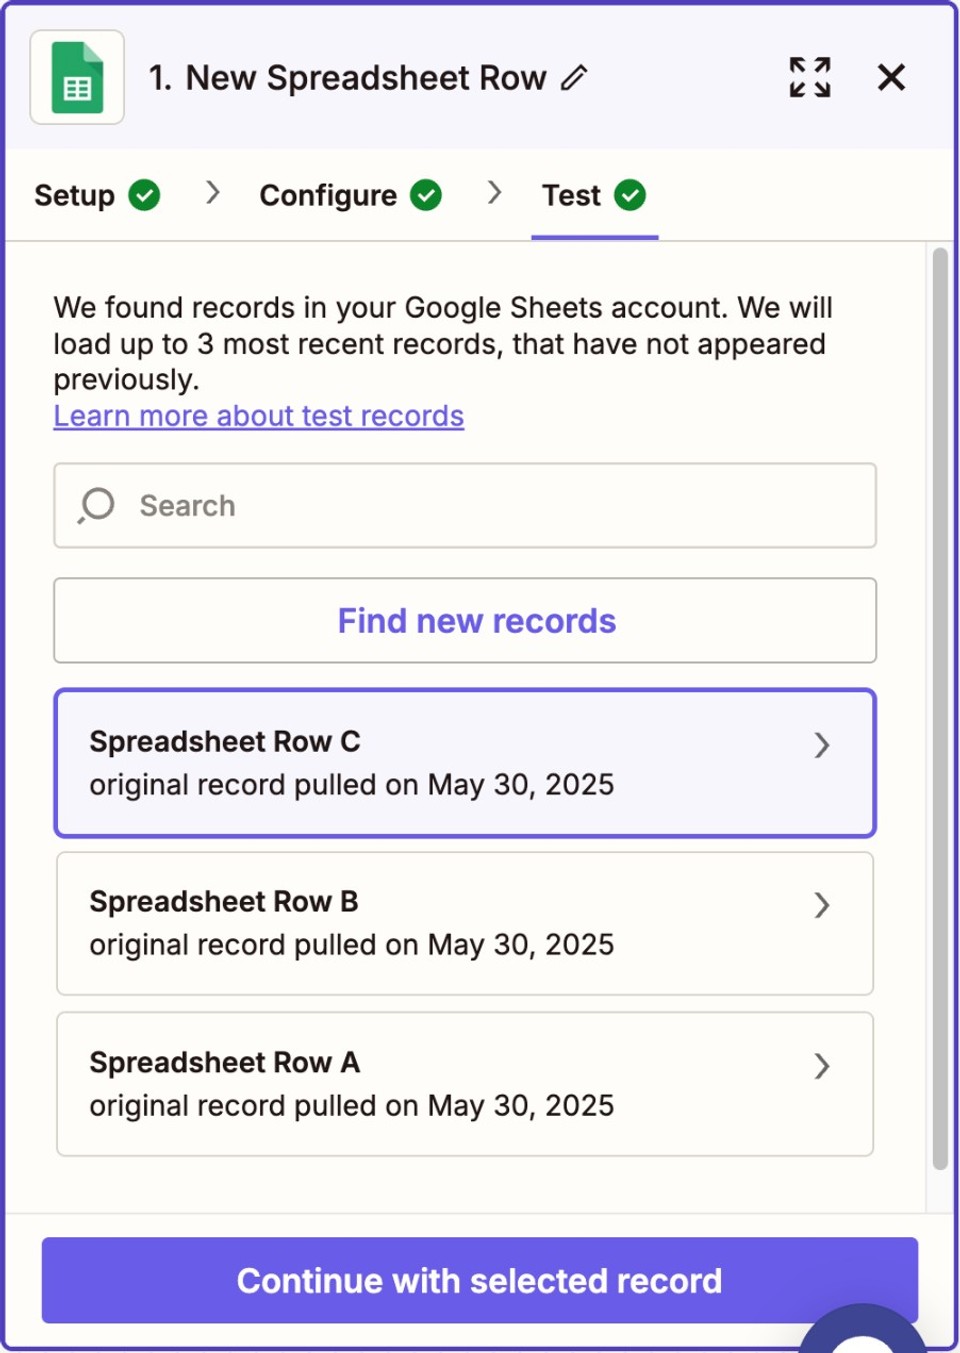
Test Trigger: Zapier pulls the most recent three rows (you’ll see Row C, Row B, Row A).
Verify that columns map correctly, then click “Continue with selected record.”
Your Zap now fires whenever a new row appears - no crazier than adding a single idea to a sheet.
Part 2 - Generate the Video (Zapier → Fliki)
Add Action ➜ Search for App: Fliki
Set Action Event: Create New Video.
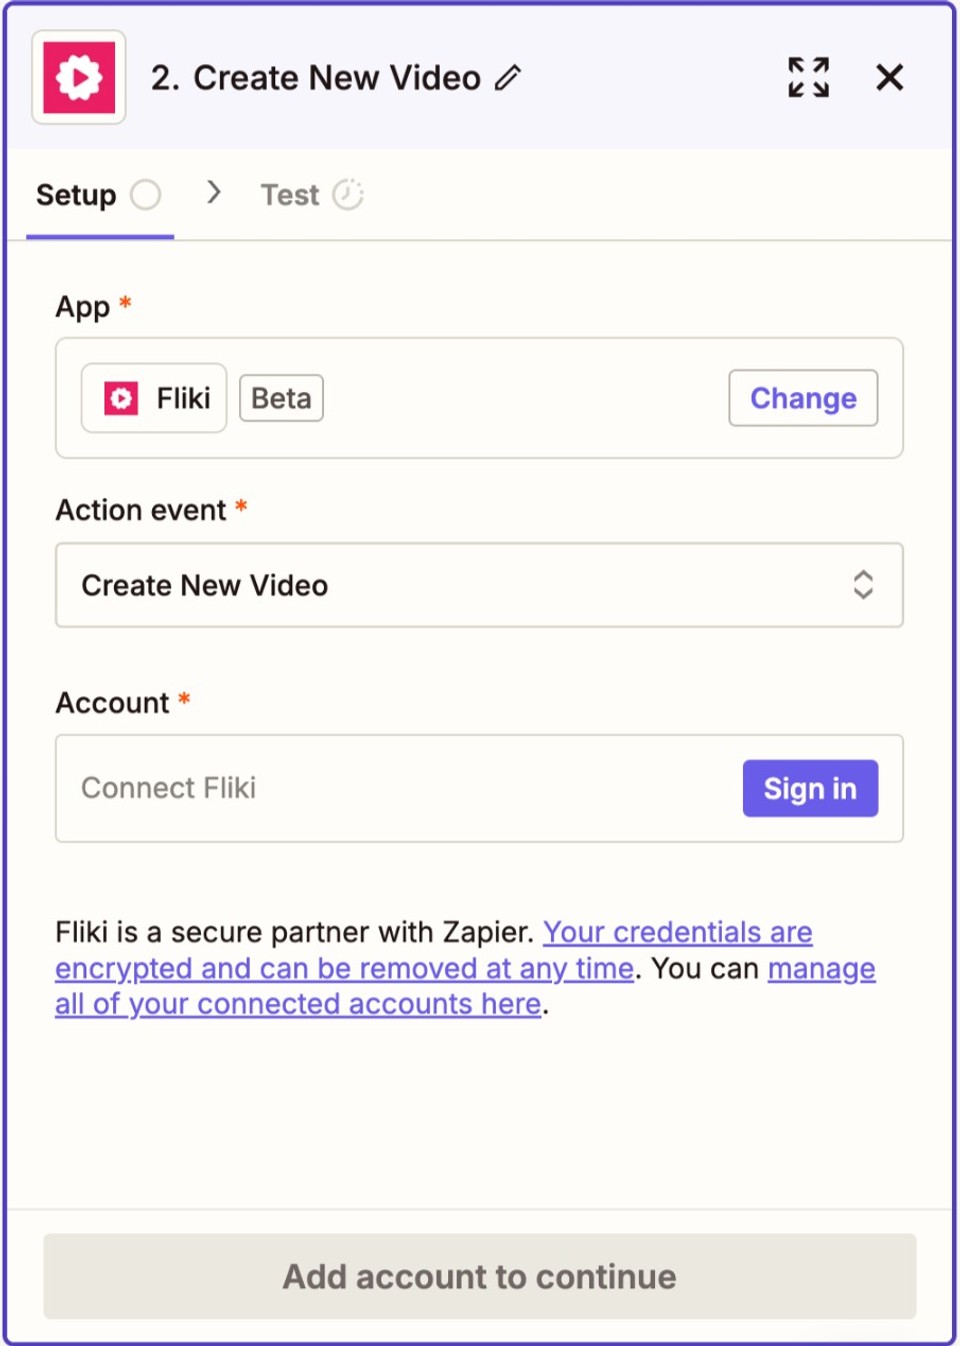
Connect Fliki Account:
In another tab, visit Automation section in Fliki.
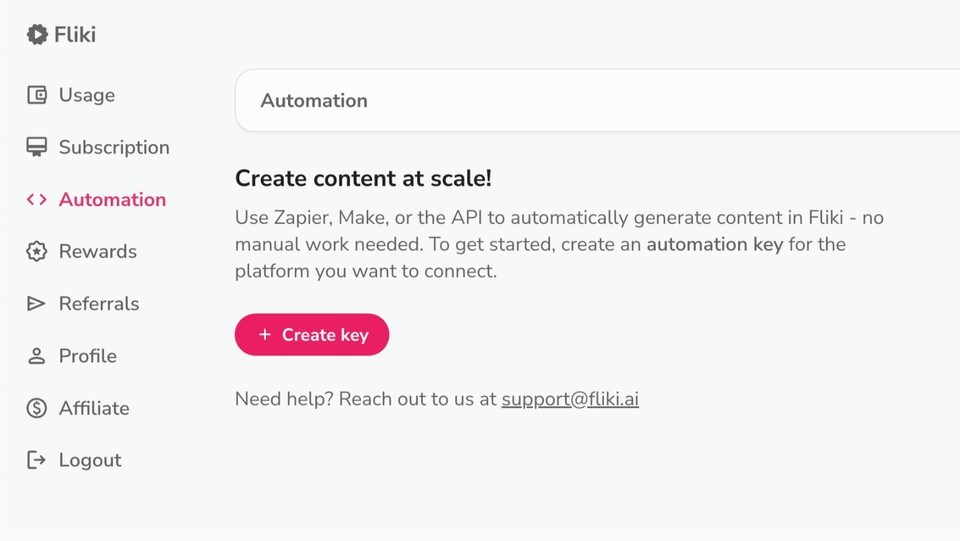
Click ➕ Create Key, choose Zapier in the dropdown.
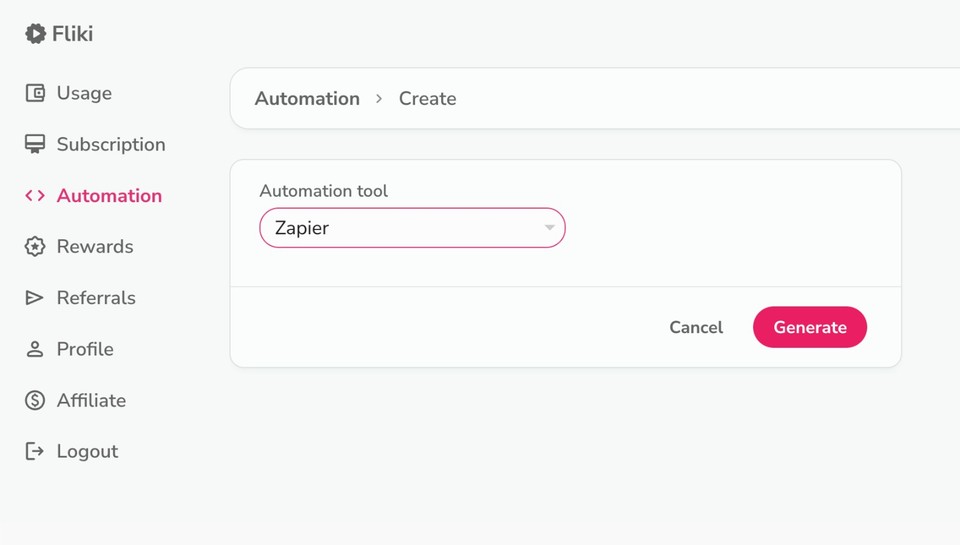
Next, press Generate, then Copy the key.
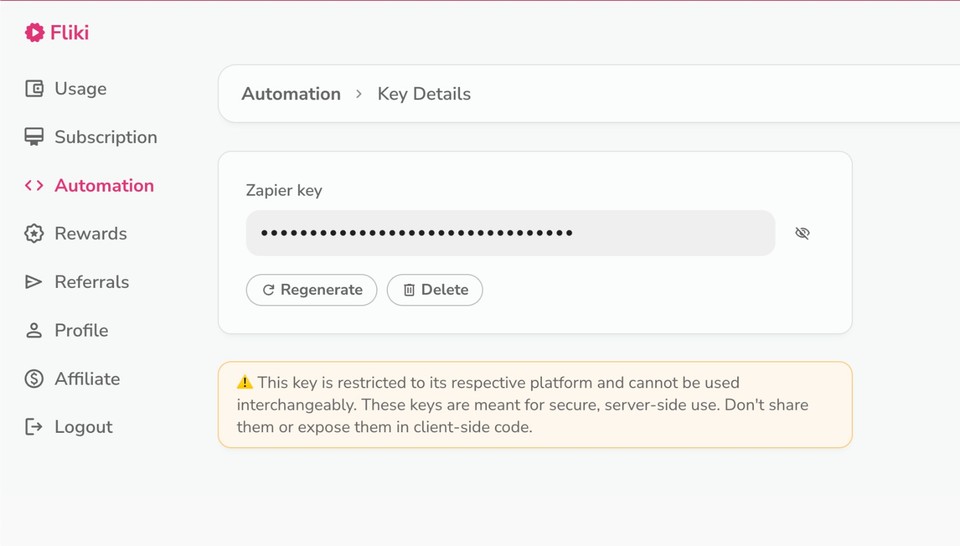
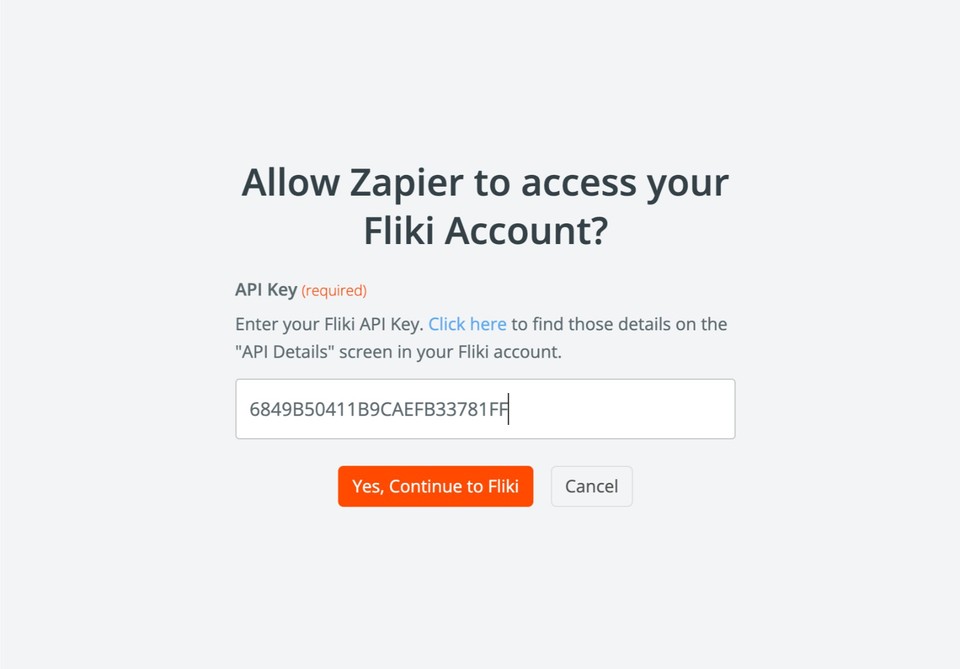
Back in Zapier, click Sign in, paste the key, and Yes, Continue to Fliki.
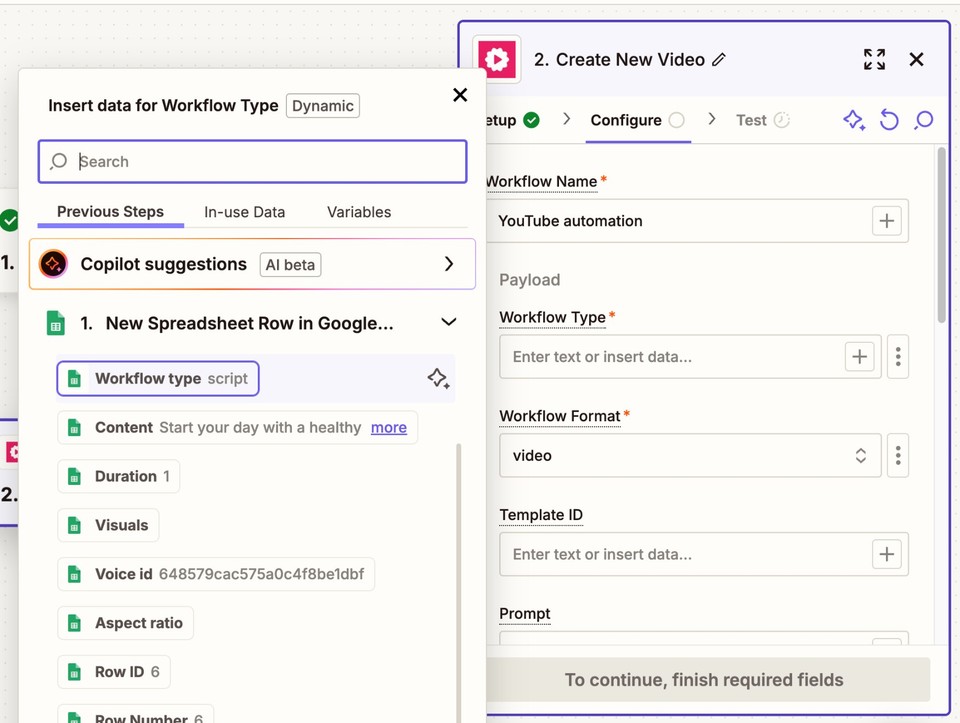
Configure Payload:
Workflow Folder Name - type or map a static folder (e.g., “AI-YouTube”).
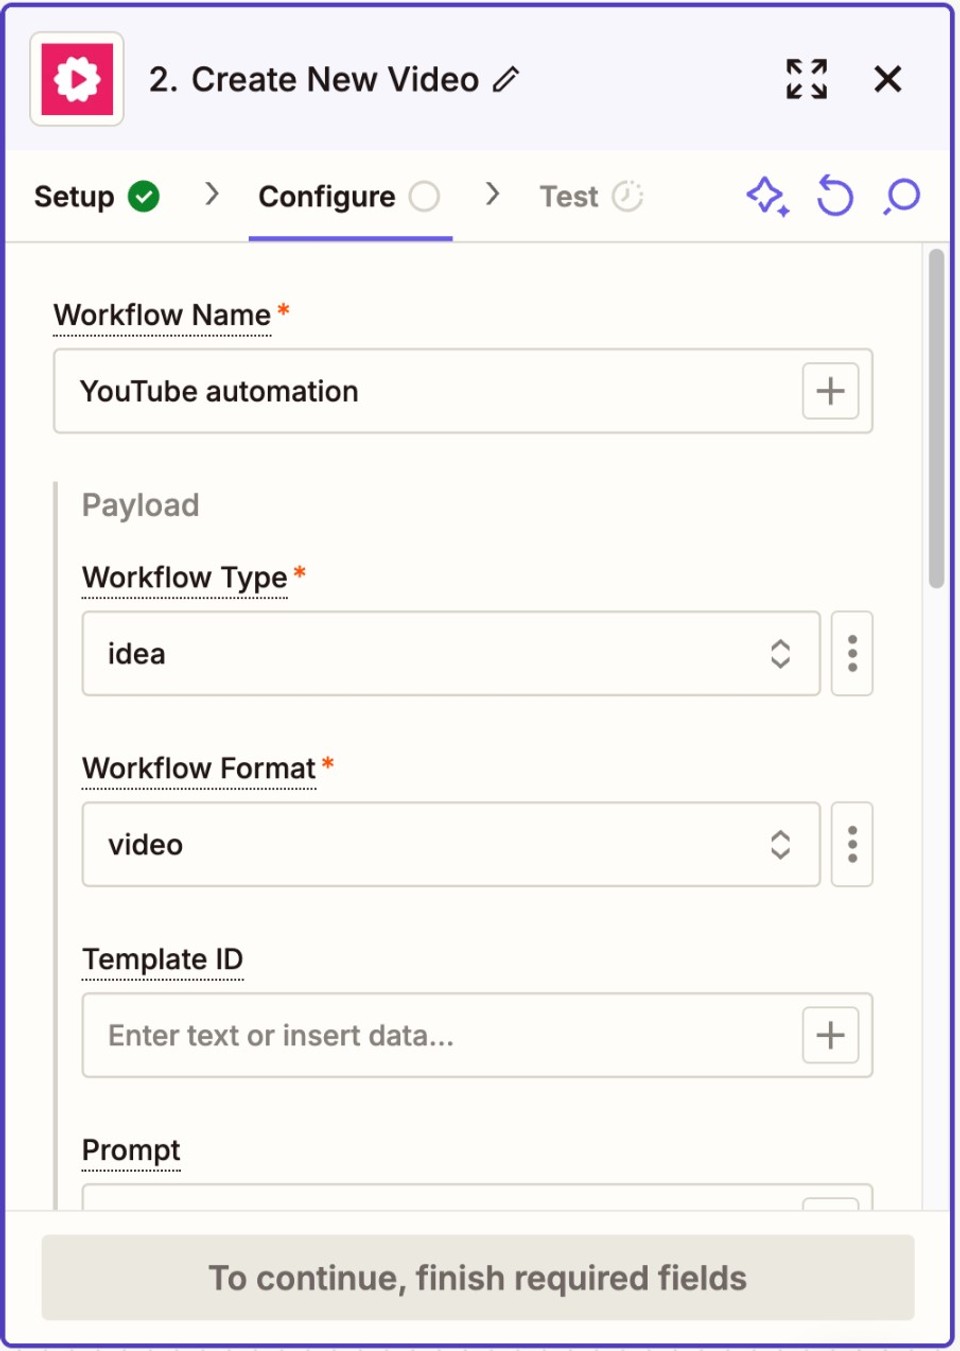
For every other field (Workflow Type, Workflow Format, Template ID, Prompt, Content, etc.)
Click the ⋮ three dots ➜ Custom ➜ pick the matching Sheet column.
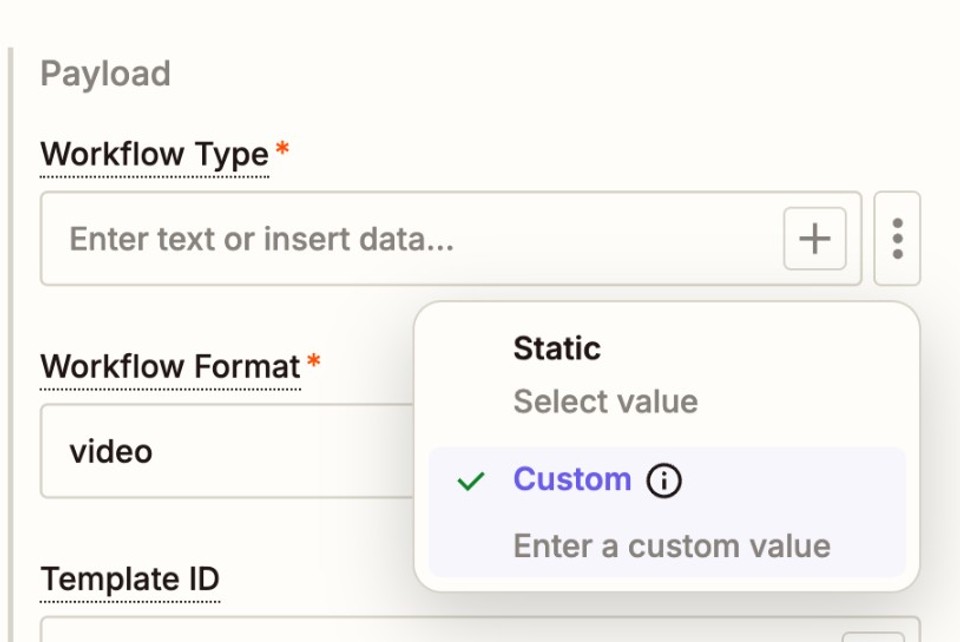
Example: workflow_type → select Column A (value: url).
Test Action: Zapier sends the payload; Fliki returns a file_id plus status “processing.”
A new video starts rendering inside your chosen Fliki folder.
Part 3 - Publish to YouTube (Zap 2: Fliki → Zapier → YouTube)
⚠️ Important: You can’t directly publish the video to YouTube in the same Zap that generates it. Fliki’s rendering is asynchronous, meaning it takes time to process. Instead, use a second Zap to monitor for completed renders and handle publishing.
Workflow Overview (Zap Structure)

Trigger Event: Fliki Video Render Complete → This triggers when a video finishes rendering in your Fliki account.
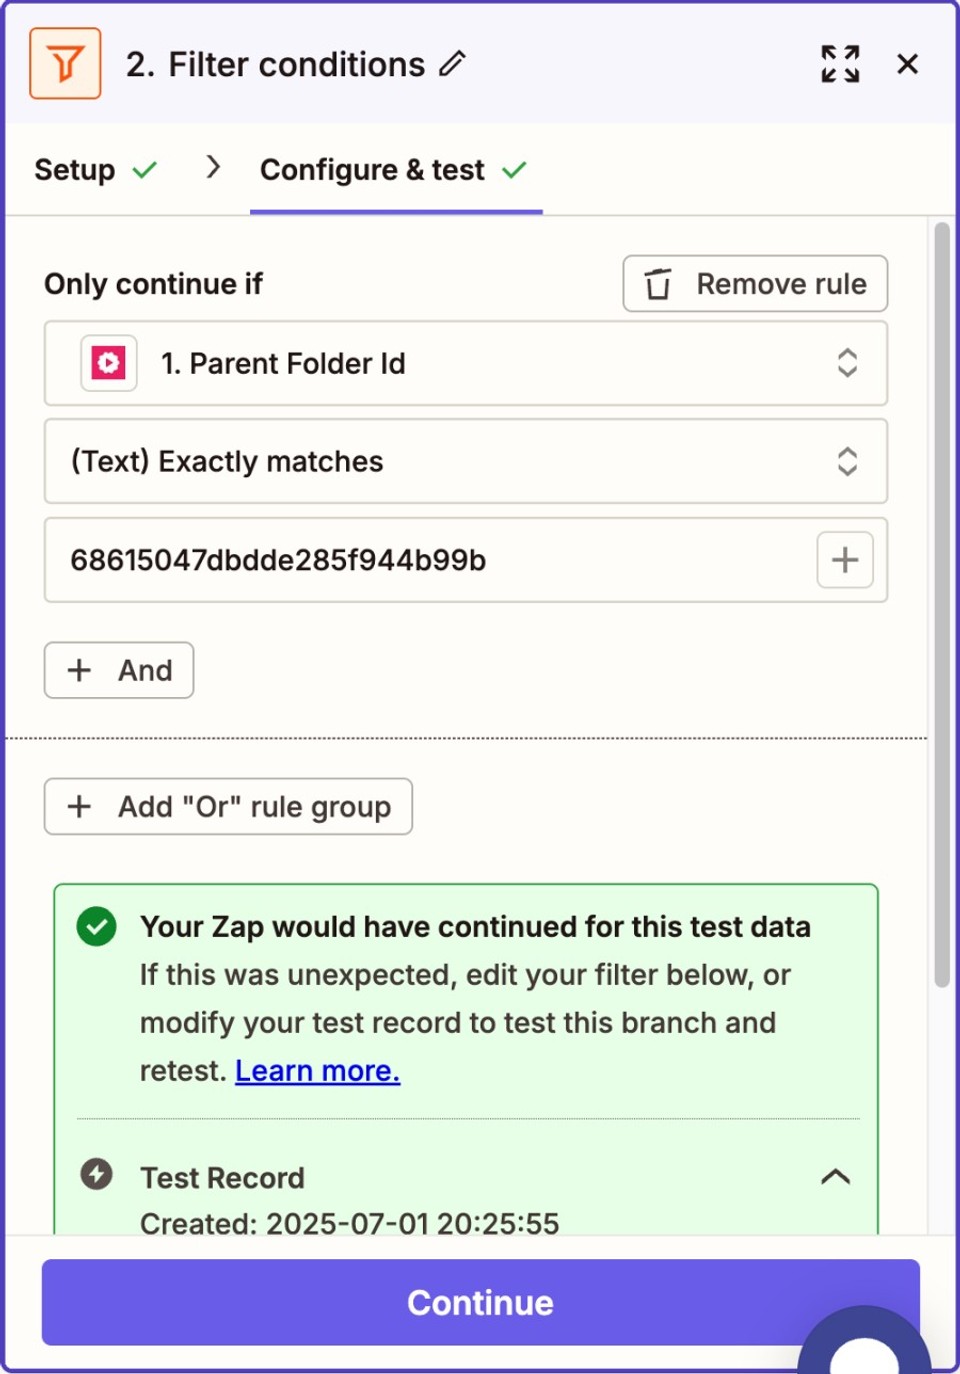
Filter Event: Filter by Zapier Condition: Parent Folder Id exactly matches 68615047 dbdde285f944b99b - This ensures only videos from a specific folder proceed further.
Action Event: YouTube Upload Video → Uploads the filtered video to YouTube.
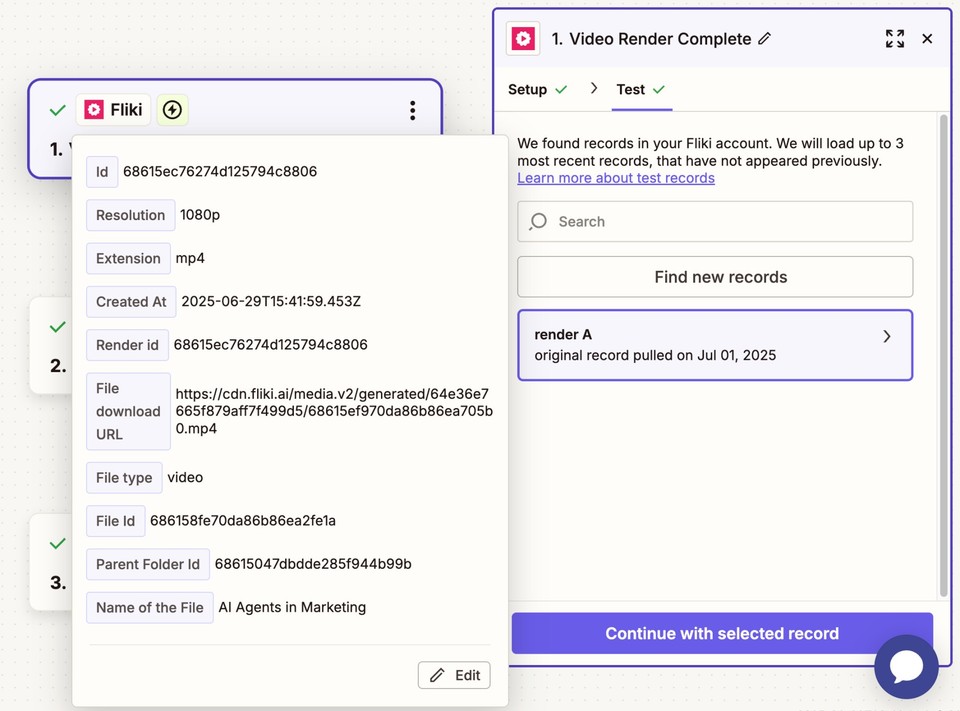
Step 1: Fliki - Video Render Complete
The automation begins with a trigger set to fire whenever a video is fully rendered in Fliki. This ensures Zapier only acts when:
A video has completed rendering.
Metadata such as the video name, format (e.g., .mp4), resolution, and download link are available. This step captures all the necessary details needed for the next phases.
Step 2: Filter by Zapier
To avoid uploading every video created in Fliki, a filter condition is added:: Only continue if the video belongs to a specific folder ID.
This allows you to separate draft content from final, publish-ready videos. Only assets placed in your designated "YouTube-ready" folder will move forward in the workflow.
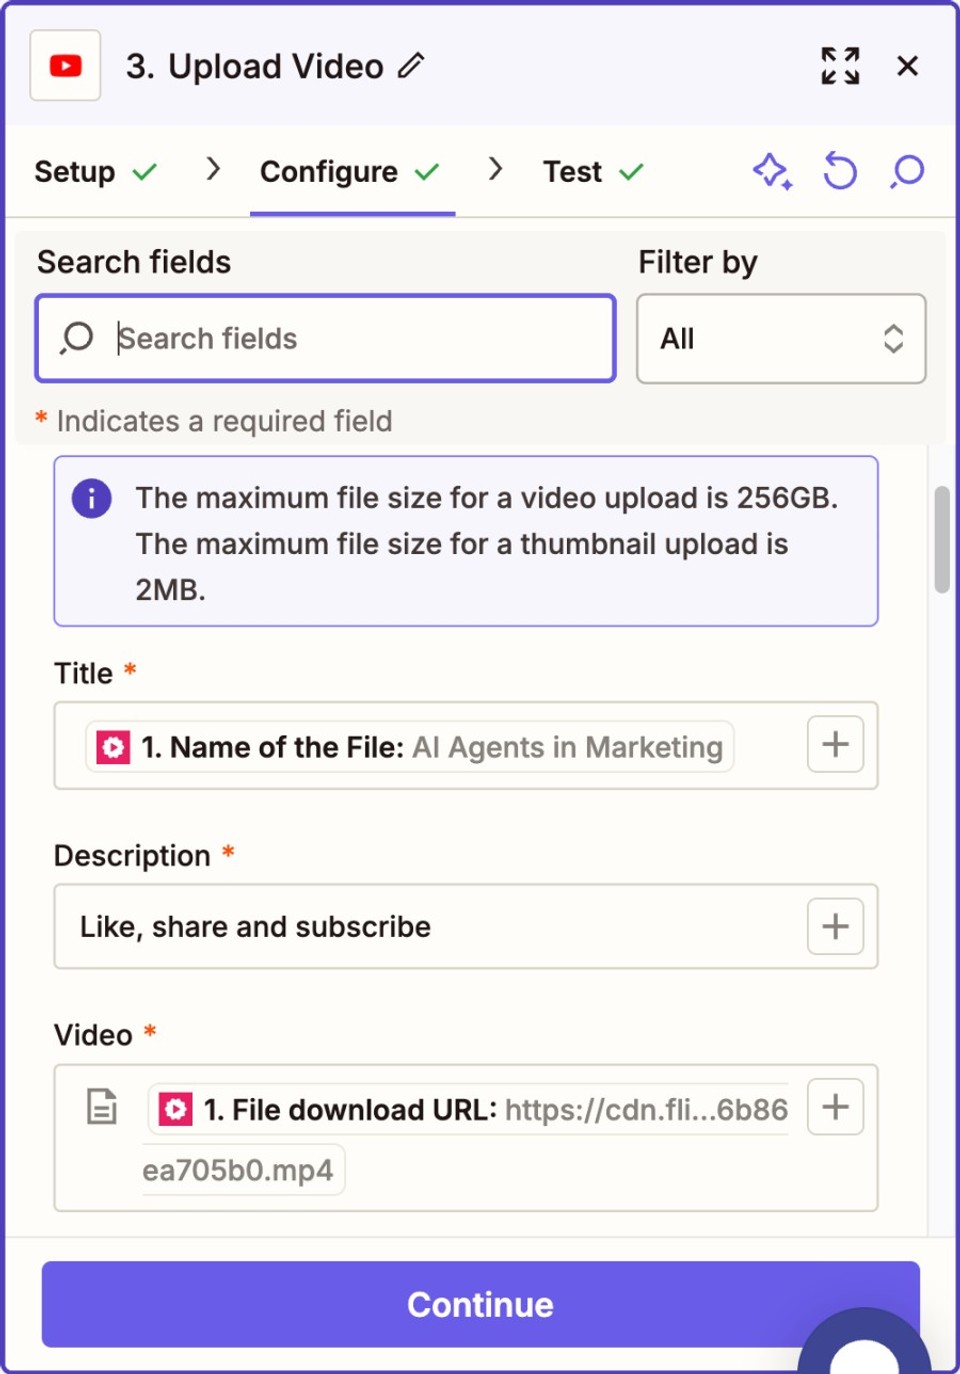
Step 3: YouTube - Upload Video
Once the video passes the filter, Zapier proceeds to upload it directly to your connected YouTube account. You can configure:
Title: Pulled from the Fliki project name.
Description: Include default calls-to-action like “Like, Share, and Subscribe.”
Video file: Uploaded from the Fliki-rendered link.
This final step completes the content pipeline - going from creation to publication entirely hands-free.
Testing & Debugging Like a Pro
Milestone | What to Check | Fix If Fails |
|---|---|---|
Trigger | Does Zapier see new rows instantly? | Ensure correct worksheet; enable “include headers” OFF. |
Fliki Action | Status shows “completed”? | Long text prompts may exceed character limits; trim or split. |
YouTube Upload | Video playable? Metadata correct? | Double-check API quotas, thumbnails < 2 MB. |
Zapier’s Task History gives granular logs - use it religiously.
Pro Tips & Advanced Tweaks
Branching Logic: Add Paths to publish shorts vs. long-form based on the Aspect ratio and Duration.
Bulk Imports: Use ChatGPT/ Gemini API to drop 100 ideas into the Sheet overnight.
Dynamic Thumbnails: Call Canva’s Zapier integration alongside Fliki step to auto-design thumbnails.
Error Handling: Turn on Auto-Retries or route failed tasks to Slack for manual review.
Version Control: Duplicate your Zap before major edits - Zapier keeps revision history, but having a clone is safer.
Repurpose Elsewhere: Swap YouTube for TikTok, LinkedIn, or your podcast host. Fliki outputs MP3 as well.
Measuring Success & Next Steps
Analytics: Inside YouTube Studio, tag automated uploads with a unique prefix (e.g., “⚡Auto:”) to isolate performance.
CTR & Watch Time: Compare manual vs. automated videos—tweak Fliki templates if audience retention dips.
Scale: Increase frequency slowly; algorithm penalizes spammy bursts.
Iterate Headlines: Because title is just a cell, A/B testing becomes a breeze - update the row, re-render, re-upload (or simply update the existing video title).
Final Thoughts
Automation isn’t about replacing creativity; it’s about amplifying it. By outsourcing repetitive tasks to Zapier and Fliki, you reclaim hours for brainstorming, community engagement, and big-picture strategy.
So the next time inspiration strikes, don’t let editing anxiety dampen the spark. Open your trusty Google Sheet, punch in the prompt, and let your brand-new video factory roll.
Happy automating, and may your channel growth curve resemble a hockey stick!