Introduction
I can still remember that excited, butterflies-in-my-stomach feeling when I first started creating online courses. The idea that I could share my passion for a subject—marketing, of all things—with learners around the world felt like a dream. But as my audience grew, I began receiving emails complaining about slow-loading videos or choppy playback. “Your video keeps buffering,” one student wrote, frustrated. Another said, “I can’t access the videos on my phone properly.” All of these issues pointed toward one glaring solution: I needed a video LMS.
At the time, I honestly had no clue what that even meant. “Video LMS?” I remember asking a colleague. “Don’t I just need to upload MP4 files somewhere on my course website?” Little did I know, I was missing a whole layer of specialized technology for streaming, security, and a seamless user experience.
Today, I want to share the lessons I’ve learned—the aha moments, the pitfalls, and the surprising joys. If you’re exploring how to add or optimize videos in your e-learning video platform, then grab a cup of coffee and settle in. I hope my personal journey will help guide yours.

Why Video Matters: Elevating the E-Learning Experience
Before diving into the nitty-gritty of streaming solutions and DRM protection, let’s start with a simple question: Why do we even need video in e-learning? Well, I quickly discovered that video isn’t just an optional extra—it’s often the core driver of engagement.
It turns out there’s real science behind this. People retain more when they see and hear information simultaneously. According to VisualCapitalist, video-based lessons can enhance student satisfaction by 91% and student achievements by 82%. Whether it’s an employee onboarding course or a peer-to-peer learning platform, videos make it more personal, more tangible, and yes—way more fun!
But here’s the kicker: Good video alone isn’t enough. You can create the best videos in the world, but if they’re slow to load, easily pirated, or glitch on certain devices, all your hard work goes down the drain. That’s where the video LMS enters the story.
Why Hosting Your Videos Separately Makes Sense
When I built my course website, my first instinct was to directly upload MP4 videos into my learning management system (LMS). I figured: “Why complicate it? Let me put them in the same place.” Well, spoiler alert: That turned into a nightmare.
-
Site Performance Tanked: My website slowed to a crawl because each page had heavy video files to load. Several students in remote locations even reported they couldn’t watch anything.
-
No Security: I discovered that if you just right-click on a directly hosted video, you could easily download it without permission. Not ideal if you’re selling premium content.
-
Manual Encoding: I had to figure out how to convert these videos into various file types, but I’m not exactly a video format guru. The result? Endless hours searching for “best video encoding for web streaming.”
-
Lack of Analytics: I had no idea how students were interacting with my videos, how far they watched, or where they dropped off.
That’s when I realized: “I need a specialized video hosting solution that integrates with my LMS.” This approach offloads the heavy lifting (literally the heavy video files), giving my site more breathing room to load quickly and handle multiple simultaneous users.
Key Elements to Look For in a Video Hosting Solution for Your LMS
Let’s talk features. The world of video streaming solutions can feel overwhelming with all the jargon—DRM, adaptive bitrate streaming, custom video players. I remember feeling like I needed a dictionary to decode it all. Below, I’ll break down the must-haves in simpler terms.
1. DRM-Protected Videos
DRM or Digital Rights Management basically ensures your videos are encrypted and harder to steal. For me, this was critical. Once I switched to a DRM-protected solution, I noticed a drop in unauthorized sharing. The technology essentially encrypts video streams, verifies user permissions, and blocks typical download attempts. For a content creator, that’s priceless peace of mind.
2. Custom Video Player
When you embed a video onto your site, that player is the “front door” of the viewing experience. A custom video player lets you brand that experience, adding logos or color themes, or even adjusting playback controls. This not only looks more professional but also helps maintain a cohesive brand identity.
3. Adaptive Bitrate Streaming
In a perfect world, we’d all have lightning-fast internet. But reality is more nuanced—some learners access videos from rural communities, or on older devices, or with data throttled plans. Adaptive bitrate streaming (ABR) automatically adjusts video quality based on the user’s bandwidth. That means fewer buffering issues and a smoother learning experience for everyone.
4. Dynamic Watermarking
For added security, some platforms let you overlay user information—like an email or username—on top of the video. It’s subtle but deters unauthorized screen recordings because anyone who shares that recorded content is basically revealing their own identity.
5. Video APIs, SDKs, and Plugins
If you’re a bit of a tech enthusiast—or you have a developer on your team—APIs and SDKs can help you automate tasks such as uploading or generating playback tokens. Plugins for WordPress, Moodle, and other popular LMS platforms can drastically simplify your workflow.
6. Access Controls
Sometimes you only want your videos to be accessible for a certain timeframe, or within a specific location. That’s where geo-restrictions and time-based access come in. Think of it as a VIP pass that expires or only works in certain regions. It’s super helpful for seasonal promotions or territory-specific licensing.
Using AI to Create Engaging Video Content
Alright, so we’ve handled the streaming side. But what about actually creating those videos? Let me share a personal story. A few years back, I would spend hours upon hours scripting, recording, and editing videos with a professional camera setup. It was exhausting. Then I discovered AI-powered tools —and my workflow changed.
Why AI Video Creation?
-
Time Saver: AI tools can generate scripts, visuals, and even voiceovers. You can focus on the content’s substance rather than fussing with advanced editing software.
-
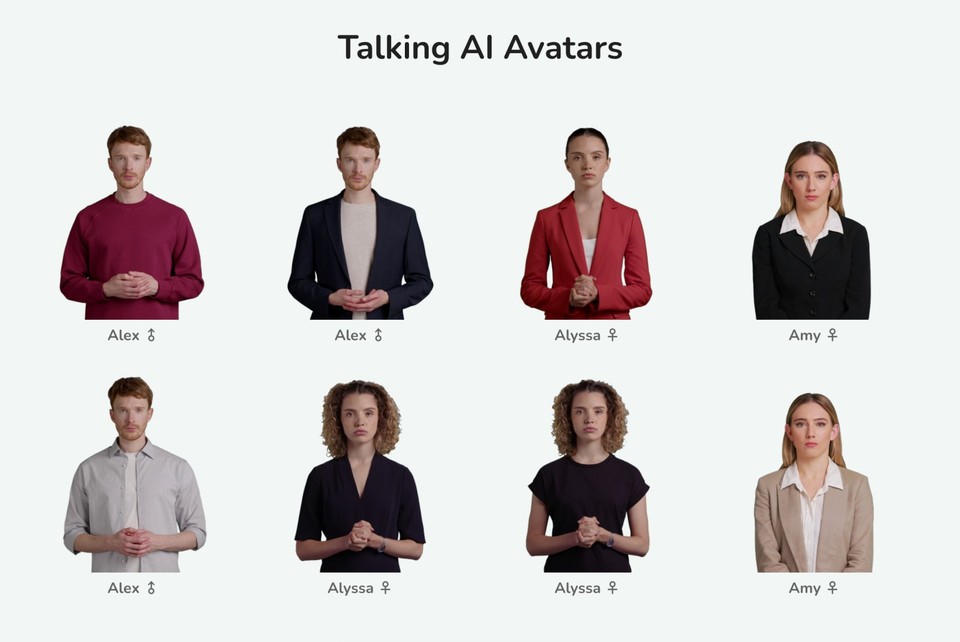
Custom Avatars: Some solutions let you create or choose an AI avatar (a virtual presenter) for your training videos. This adds a human touch without requiring you to be on camera every single time.
-
Language Versatility: If you have an international audience, you can easily produce versions of the same video in multiple languages—sometimes with just a few clicks.
How to Create an eLearning Video with AI
Maybe you’re intrigued by the promise of AI video creation. Let me walk you through a simple process, using a tool like Fliki as an example.
Step 1. Set Objectives
Start by asking: “What’s the main takeaway I want for my learners?” For instance, if you’re creating an onboarding video for new hires, figure out what they need to understand in those first few days—company values, tools, or basic protocols.
Step 2. Write a Script
AI writing tools like ChatGPT or Rytr can help you kick-start your script. Provide context about your audience and objectives. For example:
“Write a 300-word onboarding script for new marketing associates, introducing them to the team structure, daily tasks, and performance expectations.
[Give additional context based on your personal use-case]”
You’ll likely get a neat first draft that you can then polish up.
Step 3. Choose a Video Generator
Head to a platform such as Fliki, Synthesia, or Heygen. Some will prompt you to paste your script directly; others may let you upload a text file.
Step 4. Pick Your Visuals
Depending on the AI tool, it may automatically suggest stock footage or images to match your script. If you have brand assets—like your company logo or product screenshots—feel free to upload them.
Step 5. Add an AI Avatar
If you want a presenter-style training video, select an avatar from the library or upload your own image. This helps to humanize the lesson, making it feel less robotic.

Step 6. Customize the Details
-
Voiceovers: Many AI video generators offer a selection of voices with different accents.
-
Background Music: Light, subtle music can keep learners engaged without distracting them.
-
Watermarks or Text Overlays: If you want to brand your video or add disclaimers.
Step 7. Preview & Edit
Always watch the entire video before finalizing. Listen for mispronunciations or awkward pauses. Tweak the visuals if something feels off.
Step 8. Export & Embed
Once you’re happy, export the video in the format that suits your LMS (often MP4 or a direct embed code). Now, you’re ready to share it with the world—or at least your learning community!
How to Integrate Videos in Your LMS
Now let’s get into the practical side: embedding the video into your LMS. Whether you’ve created your own video with a smartphone or used AI video creation tools, the steps are similar:
Step 1. Upload to Your Video Platform
Choose a secure video hosting platform. Once uploaded, the system will process and optimize your file for streaming (e.g., generating different quality levels).
Step 2. Generate an Embed Code
Most hosting solutions provide a code snippet (HTML iframe or a dedicated plugin). Copy that code.
Step 3. Head to Your LMS
Whether you’re using WordPress with a learning plugin, Moodle, or any other platform, open up the course lesson page where you want the video to live.
Step 4. Edit the Lesson HTML
Switch to HTML mode (or a block editor where you can insert code), and paste in the code snippet.
Step 5. Save & Test
Hit save, then view the page as a student would. Check that the player loads quickly, the video plays, and all controls function as expected.
If your LMS supports dedicated plugins for your chosen video solution, the integration process might be even easier. Within just a few clicks, you can directly import the video, set access controls, and voilà—your e-learning lesson is alive and kicking.
Potential Pitfalls and How to Avoid Them
No technology is perfect, and a video LMS is no exception. Here are some common pitfalls:
1. Overcomplicating the Setup
It’s easy to get lost in advanced features. Start small—pick a user-friendly video hosting platform, learn the basics, and gradually explore more complex functionalities like DRM or dynamic watermarking.
2. Underestimating Bandwidth
Make sure you choose a hosting provider that can handle peak times. If you’re launching a major course to a large audience, be prepared for an influx of viewers.
3. Ignoring Accessibility
Videos should have captions or transcripts for learners with hearing impairments or for those who simply prefer reading along. Some AI tools can auto-generate captions, so this is easier than ever.
4. One-Size-Fits-All Content
Remember that not all learners have the same background knowledge. Tailor video content to different levels (beginner, intermediate, advanced) or create supplementary modules for learners who need more support.
5. Skipping Testing & Feedback
Always pilot your videos with a small group. Gather their feedback on clarity, pacing, and technical performance. A quick user test can save you from bigger headaches down the road.
The Future of E-Learning with Video
It’s mind-blowing to consider how far we’ve come. AI avatars, DRM protection, adaptive streaming—these are all real, accessible tools right now. Looking ahead, I’m excited to see even more personalization in e-learning, possibly with real-time analytics that adjust content on the fly based on learners’ performance. Imagine a scenario where the LMS detects you’re struggling with a concept and automatically serves up a simpler explanation or a different video format.
Virtual Reality (VR) is another horizon that could blend seamlessly with video lms technology. We may soon have immersive, 360-degree video experiences that place students in real-world scenarios, all accessible via a standard web browser. Checkout the following video shared by Meta Quest YouTube channel:
But even as we dream big, it’s crucial to keep that human element alive. We can’t forget the feeling of connection and authenticity that a real instructor’s voice or personal story can bring. That’s why, in my own courses, I like to mix AI-generated modules with videos I record myself. It’s a best-of-both-worlds approach that resonates with a wide range of learners.
Conclusion
If you’ve stuck with me this long, I want to say “thank you.” It means you’re serious about elevating your e-learning or training materials through the power of video. Whether you’re an independent course creator or an HR manager at a large corporation, a video lms can take your learning environment from basic to brilliant.
Just remember:
-
Hosting videos separately on a dedicated platform frees your site from lag and speeds up access for your learners.
-
Tools like DRM and dynamic watermarking safeguard your content.
-
AI solutions (like Fliki) speed up the video creation process, making it easier to maintain a steady flow of fresh content.
-
Always keep your learners in mind—accessibility, device compatibility, and user experience are paramount.
Personally, transitioning to a video-based course model felt like climbing a mountain at first. But every time a student tells me my videos made a concept “click,” it reaffirms that the climb was worth it. If you’re ready to level up your e-learning game, there’s no better place to start than embracing a video LMS. As you take these next steps, I hope you’ll discover the same sense of fulfillment that I have—knowing your digital classroom can truly come alive, one video at a time.


