General
How do I create a video?
You can use Fliki to create videos easily with the power of AI. Head over to the Fliki App and sign up for free to start your content creation journey today!
How does Fliki work?
Fliki is changing how content is made for people and businesses. We use advanced AI to turn text into multimedia content from audio, videos, images, and more.
Is Fliki free to use?
Yes, Fliki comes with a free plan that offers 5 credits every month. If you are looking to generate more content, you can upgrade to our subscription plans.
How to log in to Fliki?
Please head to app.fliki.ai to log in with an existing account on Fliki or sign up to create a new Fliki account.
How to log out of Fliki?
To log out of Fliki, navigate to the accounts page and click on the "Logout" option located at the bottom of the left panel. Upon clicking, a confirmation dialog box will appear asking, "Are you sure you want to logout?" Confirm by selecting "Logout" to successfully log out of your account.
When will the free credits be available again?
The free credits will reset automatically every month based on the plan cycle, which is usually the registration date for the free plan. Once renewed, you can create videos for free again.
What is the maximum count of scenes in one file?
Fliki has following scene limit per file depending upon the active plan:
For free plan, the scene limit is 10 scenes.
For standard plan, the scene limit is 50 scenes.
For premium plan, the scene limit is 100 scenes.
Who owns the content?
Publishing rights are owned by the user of the content, Fliki does not own any content. Please note that the media provided in Fliki is either licensed or royalty-free, giving the user of any paid plan commercial rights.
Will I retain the commercial license for my videos after my paid subscription ends?
Yes, you will retain the commercial license for all videos created during your paid subscription period. You have full ownership and rights to continue using and distributing those videos for commercial purposes without any limitations.
What are AI or neural network-based voices?
Artificial Intelligence and neural networks are the advanced methods of training machines to learn from hundreds of hours of real human voices and generate voice models.
These models are then fine-tuned to produce the results you see on Fliki.
How to track my usage or view my credits?
We calculate the usage based on the text that has been converted to audio and exported video. You can see your quota/usage under Account → Credits.
What are credits?
Fliki credits serve as the primary unit of measurement for various actions within the platform.
Credits are updated based on your billing cycle, which begins one month after the date you sign up. The monthly quota resets every month, and credits cannot be carried over or accumulated to the next month’s quota.
Fliki offers 5 credits per month under the free plan when you create an account.
If you want to increase your credits, check out our subscription plans.
Find a detailed explanation of how credits work here.
Why is my IP blocked?
This may happen if you try to sign up using a disposable/temporary email. Using such email to signup is against the policy. You can try using Google or Facebook login. Also, please share your IP address to support@fliki.ai so we can enable it. To check your IP address please head over to this link.
How to change my password?
There are 2 ways to go about doing this:
Head to the profile page and select the option to “Change Password.”
Ensure you’re logged out and go to the sign-in page, select “Continue with Email” and enter your email address. Select forgot password option and follow the process to reset your password.
Does Fliki have a public roadmap?
Yes, Fliki has a public roadmap. You can check it out here.
How to translate the Fliki interface into my language?
You can use Google Chrome's built-in translate feature to translate the interface into your desired language. Right-click on the page and select "Translate to [your language]." Google Chrome will automatically translate the entire page, including the interface, into your native language.
Is the music licensed for commercial use? Can I use it for my videos and post on YouTube? How to resolve copyright issue on YouTube?How to resolve copyright issue on YouTube?
Please note that media provided in Fliki is either licensed, AI-generated or royalty-free, giving the user of any paid plan commercial rights.
However, we require you to add your YouTube channel ID to the profile of your account because we have partnered with premium stock media providers that need this information to whitelist you. This ensures that you won't receive copyright strikes when using the premium content available through our platform.
For an even simpler and more seamless experience, you can enable YouTube licensed music during video creation. When selected, Fliki automatically applies music that is pre-cleared for YouTube use - no additional setup required.
What is YouTube licensed music?
YouTube licensed music is a feature that lets you use music that’s specifically selected for seamless use on YouTube.
When you enable the YouTube Licensed Music checkbox in Advanced Settings, Fliki automatically picks background tracks from a library of fully licensed, copyright-protected music.
This removes the need for manual setup and provides the most streamlined way to add music to your videos.
How to resolve a copyright issue on YouTube?
If you’re a paid user and receive a copyright claim on your video:
Make sure your YouTube channel ID is added correctly in your Fliki profile.
If it’s already added, then we recommend you to dispute the copyright claim by following the process given on this page.
To avoid such situations altogether, we recommend enabling YouTube licensed music under Advanced Settings during video creation. This ensures your background music is selected from a set of tracks designed specifically for smooth YouTube publishing.
What is the maximum number of YouTube channel IDs I can add in the profile section on Fliki?
You can add up to 5 YouTube channel IDs in the profile section on Fliki.
How do I save changes to my files on Fliki?
All changes made on Fliki are automatically saved. There is no need to manually save your edits, as Fliki's autosave feature takes care of this for you.
Does Fliki have a mobile app?
Fliki is currently a web-based application and does not have a dedicated mobile app. You can access Fliki through your web browser on any device, including smartphones and tablets, by visiting the Fliki website. It is optimized for use on various devices, providing flexibility and accessibility to anyone who uses Fliki.
What to do when the voiceover is not working?
If the audio is not working, please follow the steps provided to troubleshoot it:
1. Check if you have exhausted your credits on the Account page.
2. Replay the scene where the audio is not playing.
3. Re-edit the scene by adding a space in the voiceover layer and playing it again.
Feel free to contact support@fliki.ai if you're still facing an issue.
What should I do if I get errors or encounter crashes?
If you experience crashes in Fliki, you can try the following troubleshooting steps:
Use Google Chrome browser: Ensure you are using the latest version of Google Chrome on your desktop or laptop for the best compatibility with Fliki.
Clear cache and cookies: Clear your browser's cache and cookies to eliminate any potential conflicts or outdated data that might be causing the problem.
Disable Google Translate - Don’t translate the page - keep in English: If you are using Google Translate to view the Fliki page in another language, try switching it back to English to prevent any translation-related issues.
Try incognito window: Open an incognito or private browsing window in your browser and access Fliki from there. This can help identify if any browser extensions or settings are causing the problem.
Try a different browser: If the issue persists, try using a different browser to see if the problem is specific to one browser.
Use a different internet provider/connection: If you have access to multiple internet connections or providers, try using a different one to see if the issue is related to your current network.
By following these steps, you can often resolve common issues related to crashes and voice-over problems in Fliki. If the problem persists, feel free to reach out to our support team for further assistance.
How to clear browser’s cache and cookies?
Here’s how to clear your Chrome browser’s cache and cookies:
On your computer, open Chrome.
At the top right, click More (three vertical dots) and then select Delete browsing data.
Set the time range to All time.
Make sure to tick the boxes for Cookies and other site data and Cached images and files.
Click Delete data.
This will remove your cookies and cached files, helping to resolve loading issues or improve your browser's performance.
Note: If you are using any other browser, we recommend using Chrome for the best experience.
Is there a size limit for files I upload into Fliki?
Yes, there is a size limit of 250 MB for image, video and audio files you upload into Fliki. Additionally, there is a 100 MB limit for PowerPoint (PPT) files uploaded in the Magic Create → PPT.
Does Fliki supports third-party integration with other apps?
Fliki does not currently support integration with third-party apps. However, we provide customized API solutions tailored for enterprises. If you're interested in exploring API integration options for your enterprise, please fill out our enterprise form here. Our team will be in touch to discuss your specific needs and provide further assistance.
How many devices can be logged in to a Fliki account at the same time?
A Fliki account can be logged in on up to three devices at the same time.
How to get API access?
Fliki's public API access is not currently available. However, we do offer tailored API solutions for enterprises. If you're interested in exploring API integration options for your enterprise, please fill out our enterprise form here. Our team will contact you to discuss your requirements and further assist you.
Is there a contact number for Fliki customer support?
No, Fliki doesn't have a customer support contact number at the moment. However, you can reach out to Fliki support via email at support@fliki.ai. The Fliki support team will be happy to assist you with any questions or issues you may have.
How to unsubscribe from Fliki emails?
You can unsubscribe and manage all the Fliki email notifications by going to:
Account -> Profile -> Email Notifications
How to change the account email?
Kindly e-mail support@fliki.ai from your registered email account with the email update request, and the Fliki team will update it.
How to delete the account?
To delete your Fliki account, send a confirmation email to support@fliki.ai from your registered email address.
Video
How can I set the duration of a scene?
By default the duration of the scene is determined by the duration of the voiceover; you can change this by clicking on the 3 dots next to the scene and selecting the “Custom Duration” option, and entering the duration in seconds.
How to add background music?
To add background music, add a new “Background Audio” layer in the “Common Scene”.
Click on “Choose file”, search for the media, or upload your own music.
How to add transition sound effect?
To add a transition sound effect to a scene, follow these steps:
Select a scene: Select a scene. Next, in the right customization panel, check the transition checkbox and choose your desired effect from the type dropdown under the transition section along with the duration and easing effect.
Select transition sound: Next, select the sound effect that best suits your scene transition. You can enhance scene transitions with sound effects like clicks, bells, booms, pops, or whooshes.
Preview: Click the play icon in the mini-player to preview the scene transition.
Apply to all scenes: You can click ‘Apply to all scenes‘ to apply the same transition effect with sound to all the scenes.
How to change the background color of scenes?
To change the background color of scenes, follow the steps:
Click on the settings icon on the top right side.
In the customization panel on the right, open the style toggle.
Pick a color from the background color picker.
How to reduce the volume of background music in Fliki?
To reduce the volume of your background audio, kindly follow the steps:
1. First open your project file in Fliki.
2. On the very top on the left side, select the background audio layer in the common scene.
3. Now, in the right customization panel, click on the audio toggle.
4. Then, you'll get a volume slider, drag the slider to left to reduce the volume.
How to move scenes up or down in the Fliki app?
To move a scene up or down in the Fliki app, take the cursor on the scene, hold the drag handle (⋮⋮ icon), and drag up or down to move the scene up or down, respectively. Note that the drag handle (⋮⋮ icon) is only visible on the collapsed scene.
How to change the format in which subtitles are displayed?
Choose from “Word”, “Phrase” or “Full” subtitle display formats, this can easily be changed by clicking on “Voiceover” layer and selecting the desired option in “Subtitle Display” in the customization panel.
How to upload pictures or videos to use in my video project?
You can upload media (pictures or videos) by clicking on the media icon in the desired scene inside the Fliki file. This will open the media selection menu. You must click on the 'My library' tab, then click 'Choose files' to upload media (pictures or videos) from your local device. After uploading, the media will appear in 'My library'; you can click on the desired media to use the uploaded media in the selected scene.
What is the purpose of Fliki workflows?
Fliki’s workflows helps you create videos from scripts, ideas, blogs, and even product (Amazon and AirBnb) URLs.
How to limit the number of scenes it generates?
While using script to video, Fliki automatically breaks your text script into different scenes based on newline breaks, which helps with dividing your content into different scenes.
If you aim to keep your text with fewer than 50 or 100 newline breaks, the system will automatically generate fewer than 50 or 100 scenes from the start, which should help reduce the need for manual edits after the video generation.
Why don't I have access to the 1000+ voices included in the standard plan?
Please note that the voices are spread across various languages and dialects.
You can try changing the language and dialect and more voice voices should appear.
Here’s how you can change the voiceover for a scene:
Click on any scene to expand it.
Click on the voice name under the Voiceover section.
This will bring up the Voice Picker, where you can choose your preferred voice. You can also filter by language, dialect and gender from the dropdowns at the top.
If you want to apply the same voice to all scenes, check the "Apply to all scenes" box at the bottom left, then click "Select."
Why does my project look like a slideshow of still images? How can I get animated video clips instead?
If your final export looks like a presentation of still images rather than moving video, it is based on the visual options chosen during the customization step of your workflow.
During the customization step, you are presented with two main options for your visuals:
Stock Media: If you select this, the system will automatically search and populate your project with relevant, moving stock video clips.
AI Image: If you select this, the system will generate custom AI visuals. When you choose this option, a new setting called AI Video appears, featuring a percentage slider.
This slider controls what percentage of your AI-generated still images are converted into animated AI video clips. Depending on how you set this slider, here is what happens:
If you set the slider to 100%: The system will first generate still AI images and show you an initial preview using those images. Behind the scenes, it will automatically trigger the conversion of all these images into animated AI video clips. Note: This conversion takes a little time depending on the AI model you selected. Please wait a few minutes after the initial image preview is generated to see the fully animated clips.
If you set the slider to less than 100% (e.g., 50%): The system will only animate that exact percentage of your visuals. For example, at 50%, half of your visuals will become animated video clips, and the other half will remain still AI images.
If you leave the slider at 0% (or do not select the AI Video option): No images will be converted into animated clips, which results in the "slideshow" effect you are seeing.
How to fix if your video is already generated as a slideshow of still images?
If you left the slider at 0% and want to animate your images after the project preview has already been generated, you don't need to start over! You can manually convert the images to video clips by following these steps:
Click the Settings icon located in the top-right corner of your Fliki project file.
In the Customization panel that appears on the right side of your screen, scroll all the way to the bottom.
Click the "Generate AI video clips" button. This will immediately trigger the conversion process and turn your still images into animated AI video clips.
How to change color of subtitle text?
To change color of subtitle text, you need to click on a scene and then select the voiceover layer. In the right panel, you'll see a "Subtitle" checkbox. Make sure it's checked and scroll down until you see text - color picker, click on it and select color of your choice.
Please note that the customization settings are scene-specific. If you want to apply the same settings to all the scenes, then please click "Apply to all scenes" at the bottom of the customization panel.
How to adjust the line spacing or the space between two lines of text?
Currently, Fliki don't have a built-in feature to adjust line spacing within a single text block. To achieve the effect of line spacing, you'll need to create separate text layers for each line and then manually position them to your desired spacing.
How to add/ upload more images or videos to a scene?
You can more media layer in the following way:
Click on the desired scene to expand.
Click on add layer, then select media.
In the dialog box, either select from 'Stock', switch to 'My' tab; then click either 'record media' to record yourself or click "choose file" to upload media from your local device or generate AI- visual from the 'Generate' tab.
Use the drag handles to adjust the media size and position in the preview window.
You can also use b-roll feature to quickly add media:
Highlight the text in the voiceover layer where you want to add the B-Roll and select 'B-roll'.
A new media layer will be added that only shows when the selected text is spoken.
You can fine-tune the media timing by selecting the media layer, checking the ‘Timing’ checkbox in the right customization panel and dragging the ‘Scene Time‘ handles. The duration can also be tweaked with the Gantt chart displayed in the media layer.
How to change the position of the subtitles displayed?
Navigate to the scene and select the voiceover layer; you'll find customization options displayed on the left panel, such as volume, speed, font, position, and a checkbox for subtitles.
Among these options, you'll find 'Position,' allowing you to make changes to where you want your text to appear.
The subtitles can be positioned in 9 different places.
How to sync subtitles with the AI voiceover?
Fliki by default automatically syncs the subtitles with the AI voiceovers.
However, if you feel that the subtitles aren't properly synced then you can improve the flow of your subtitles by following these steps:
Click on the Voiceover layer in the left panel.
In the right panel, ensure the Subtitle checkbox is checked.
Then scroll down, and locate the "Display" drop-down menu.
Choose one of the other option than the currently selected display option to match the subtitles to the voiceover:
Word: Displays one word at a time.
Phrase: Displays the full phrase at once.
Sequence: Displays a sequence of words for a smoother appearance.
Full: Displays the entire voiceover text at once.
This should help you align the subtitles with the voiceover more effectively.
How to remove the AI voiceover?
If you want to remove the AI voiceover, you can easily delete the voiceover layer by clicking the bin icon inside the desired scene's voiceover layer. If you need to remove it from the entire video, simply repeat the steps for each scene.
Alternatively, you can mute the voiceover for a specific scene. To do this, click on the scene, select the voiceover layer, and in the right panel, drag the volume slider under the audio toggle to the far left to mute the sound.
Please note, customization settings are scene-specific. To apply the same settings to all scenes, click "Apply to all scenes" at the bottom of the customization panel.
Pro tip: To avoid credit deductions for the AI voiceover, it's recommended to start with an empty video and not use the voiceover layer from the start, so you don’t incur charges for the AI voiceover, you don’t need.
How to remove subtitles from the video?
In order to control the display of subtitles, you need to click on a scene and then select the voiceover layer. In the right panel, you'll see a "Subtitle" checkbox. Uncheck the checkbox to remove subtitles from that scene. Please note that the customization settings are scene-specific. If you want to apply the same settings to all the scenes, then please click "Apply to all scenes" at the bottom of the customization panel.
How can I resolve the issue of being limited to 15-minute videos after subscribing to premium plan which promises video export of upto 30 minutes?
The Fliki Idea to Video feature currently has a limit of 15 minutes on all paid plans. However, if you're on the premium plan, you can create longer videos (up to 40 minutes) by manually adding more scenes and content to increase the duration of your video.
How to 'Allow support access' in Fliki?
You can 'Allow support access' by following the steps:
1. Go to your profile page: Profile Page.
2. Scroll down and click on 'Allow support access' under the Support access section.
The access is temporary (5 days) and will expire after that.
Why do AI-generated visuals(images) in videos become blurry?
Sometimes, images containing characters in not-so-modest clothing are automatically blurred due to Fliki's NSFW filter. This is done to ensure that the content remains appropriate for all audiences. You should change the prompt instruction for the image (visual) accordingly.
How to change the speed of the voiceover or narrator?
To change the speed of your voiceover, please follow these steps:
Click on any scene to expand it.
Click on the voiceover layer for that scene.
In the right customization panel, click on the audio toggle.
Then, you'll get a speed slider, drag the slider to adjust the speed of the voiceover.
Remember that these customization settings are scene-specific. To apply the same speed to all scenes, click "Apply to all scenes" at the bottom of the customization panel.
How to lip-sync avatars with voiceover?
To lip-sync and generate your avatar video, make sure the avatar layer is selected, then click 'Generate avatar video' at the bottom of the customization panel. This will sync the avatar’s lip movements with the AI voiceover for that scene.
Alternatively, you can click the settings icon in the top-right corner and select 'Generate all avatar videos' at the bottom of the customization panel on the right. This option will generate avatars for all scenes at once.
We highly recommend generating avatars at the end only to avoid unnecessary credit charges on frequent script edits.
How to make the links in the video clickable?
Currently, it's not possible to add clickable CTA buttons directly within the vide as the final output is in MP4 or MOV format, which doesn't support interactive elements.
However, you can still guide your viewers by adding a text layer as a visual CTA. Here’s how:
Add a Text Layer: Click on the desired scene where you want to add your CTA message, click on "Add Layer," then select "Text."
Customize the Text: You can now write your CTA message in the text layer. For example, you could add "Visit our website," "Subscribe now," or "Contact us for more info."
Position the Text: You can drag and position the text wherever you'd like on the screen, and adjust the size, font, and color to match your video's style.
Add Multiple CTAs: If you'd like to include the CTA at multiple points in the video, you can repeat the process of adding text layers in different scenes throughout your video.
This way, you can still effectively guide your viewers even though the CTA isn't clickable.
How to add sound effects?
You can add sound effects in the following way:
1. Click on "Add layer" on the scene/section and select "audio".
2. An audio layer will be added to the scene. Click on "choose file".
3. In the dialog box, either search a sound effect from ‘stock’, upload your own sound effect from ‘My‘ tab or switch to 'Generate' tab; then write your prompt and a sound effect based on your prompt will be generated.
4. After it gets generated; select the audio.
How to remove Fliki watermark in the videos created?
Fliki automatically adds a watermark to content for users on the free plan. Upon upgrading to a paid plan, your videos will be watermark-free. However, any videos exported during the free plan will retain the watermark until re-exported. To re-export the video, simply click the 'Download' button followed by the 'Export Again' button.
How will I know when the video is exported?
Once the respective video, audio, or design file has been exported and is ready to download, you will receive an email notification with a download link.
How to download or save the video with the latest changes?
Please note that the download usually shows the last exported version first for quick access.
To download the video with all the latest updates and changes you've made, follow these steps:
Click on the "Download" button as you normally would.
Once the download options appear, click the "Export Again" button.
It'll instruct the system to update and export the video with the most recent changes. This way, you'll ensure that the downloaded video reflects all the modifications you made.
How can I download a video without the subtitles?
To download the video without subtitles, you’ll first need to disable subtitles. To disable subtitles, follow the steps:
Click on a scene where you want to control the display of subtitles.
Select the voiceover layer for that scene.
In the right panel, locate the "Subtitle" checkbox.
Uncheck the "Subtitle" checkbox to remove subtitles from that scene.
Note: The customization settings are scene-specific. If you want to apply the same settings to all scenes, click "Apply to all scenes" at the bottom of the customization panel.
Now, to download the video with these changes, follow the steps:
Click on the "Download" button.
Once the download options appear, click the "Export Again" button which will instruct the system to update and export the video with the most recent changes.
How to resolve the 'failed to create playback' issue?
The failed to create playback issue usually occurs due to a network issue.
To resolve this issue, we recommend clearing your browser cache and cookies, then re-trying to generate a new file with a stable connection.
How do I fix the issue where the audio isn't playing in my video after uploading it?
Please try the following steps:
Click on the video in the preview panel.
The video's layer will highlight on the left.
On the right, find the "Attributes" section and open it.
Locate the volume slider and ensure it's not muted (all the way to the left). Adjust it to a higher level.
How many credits does Auto-pick feature charge?
The Auto-pick feature doesn't deduct any credits.
How to correct the pronunciation of words or voice?
Fliki provides a pronunciation map/dictionary at every script level. You can easily add custom pronunciation mapping to names and acronyms. To do this, you can follow these steps:
Click on the 3 dots in the top right corner of the screen.
Select the "Pronunciation map" option from the dropdown menu.
In the pronunciation map, you can enter your word in the original field, and its pronunciation in the 'replace with' field.
Click on the tick button on the right to update the pronunciation mapping.
Hit done at the end.
Why does the video download fail? How can it be fixed?
If you're getting an error message, one thing you can try is to click on the "Download" button and then, if a popup appears with the error message, click on "Export Again."
Additionally, you can try duplicating the file and then attempt to re-export it. This step can help resolve temporary issues caused by unexpected export failures.
If the video is successfully exported and you're able to see the exported video, but only the 'Download MP4/MOV' button is not responding, then you can right-click on the video above the download button and select "Save video as" to download it manually.
If none of these steps work, kindly send an email to support@fliki.ai!
How to translate the video into another language?
You can translate the content created in Fliki (featuring AI voiceover) in 80+ languages.
Here's a step-by-step process you can follow:
Open your existing file in Fliki.
Navigate to 'More' on the top right corner of the screen. Click on 'Translate.'
Select the desired language and dialect.
Fliki will then process the content and generate a new version of your video with the translated voiceover and subtitles.
Note: Fliki will not translate uploaded MP3/ MP4 content.
What should I do if the subtitles are not showing correctly?
If the subtitles are not showing correctly, you can try the following troubleshooting steps:
Remove any intonations: If you have added intonations like pitch, emphasis, or rate adjustments in the voiceover layer, they could impact the subtitle display. Removing these intonations might resolve the issue.
Change subtitle display to full: Fliki provides different subtitle display options, such as word, phrase, sequence, or full. If you notice issues with partial or broken subtitles, consider changing the subtitle display to "Full" to show the complete text on the screen.
Regenerate voiceover: Regenerate the voiceover by simply adding a space, removing it and playing the scene.
Select the correct font: If you’re using a language that does not use Latin characters, we recommend using a font appropriate for your language for the best experience.
By trying these solutions, you can optimize the subtitle display and ensure a smoother viewing experience for your audience. If the problem persists or if you encounter any other issues, please don't hesitate to contact our support team for further assistance.
Why is the AI Avatar feature not working on my browser?
Fliki's AI Avatar feature relies on the WebM format, and unfortunately, it is not supported in browsers such as Safari and Internet Explorer. For seamless integration and an enhanced user experience, we highly recommend using Google Chrome, which fully supports the WebM format. This ensures optimal performance and allows you to make the most of our AI Avatar feature without any compatibility issues.
How to make my custom avatar transparent?
Unfortunately, custom avatars don't support transparency as of now, so even if you send a transparent photo, the transparency won't be maintained. However, if you prefer transparency, you can choose one of our stock avatars that already come with transparent backgrounds.
How to change the frame rate of the video?
Currently, you cannot change the video's frame rate. Fliki can generate full HD video (1080p) at 30 FPS (frames per second).
Audio
What format can I download the audio file in?
Fliki currently supports audio files that can be downloaded in mp3 format.
Can I have multiple different voices in one file?
Yes, you can have multiple different voices in one file you can even choose voices of different languages in a single file to support the conversational type of audio format.
Do I have commercial rights to use the audio?
Yes, with Fliki’s subscription plans, you get commercial rights to the content created on the platform.
How to change the voice in Fliki?
To change or select a voice, you would need to follow these steps:
Click on the desired scene to expand.
Click on the voice name(default: Sara) in the voiceover layer in the required scene. This brings up a voice selection popup.
You can click on the speaker icon 🔉 to play sample audio from the voice.
To select the voice for a scene, click on the desired voice. Scroll down and check "Apply to all scenes" if you wish to use the same voice in all the scenes. Hit 'Select' at the bottom of the popup.
How to change the speed of the voice?
You can change the speed of the voice by clicking on the desired scene to expand. Next, click on the voiceover layer. Finally, In the right customization panel, you will get the slider to adjust the voiceover speed. Please note that the customization settings are scene-specific. If you want to apply the same settings to all the scenes, then you need to click "Apply to all scenes" at the bottom of the customization panel.
How to use my recorded audio file instead of AI generated voice?
Here's how to quickly turn your recorded audio file into a video with both B-roll and background music:
Go to Fliki dashboard.
Select 'Edit' workflow under the video section.
Upload your MP3 file by dragging in the drop zone, hit next.
Set customization options and hit submit.
Fliki will automatically sync the audio with the preferred media and generate scenes for your video.
How to add voice style or emotion to a voice?
To add voice style or emotion to the AI voice, follow these steps:
Click on any scene, then select the voice name(default: Sara) from the voiceover layer. This brings up a voice selection popup.
You can click on the speaker icon 🔉 to play sample audio from the voice.
Click on the desired voice with a ⚡️ icon next to them, indicating that they support different voice styles.
To convey various emotions, you can choose a voice style from the dropdown menu located at the top.
Scroll down and check "Apply this voice to all the voiceovers" if you wish to use the same voice in all the scenes.
Hit 'Select' at the bottom of the popup.
Please note that not all voices support changing voice styles. Only the voices that have a ⚡️ icon next to them indicate that they support different voice styles.
How to upload a recorded audio in Fliki?
You can upload a recorded audio file in the following way:
Click on "Add layer" on the scene/section and select "audio.”
An audio layer will be added to the scene. Click on "Choose file".
In the dialog box, you would need to go to 'my library'; then click "choose file" to upload audio from the local device
After it gets uploaded, you must select the audio to use in the scene.
Make sure your file is in MP3 format and less than 250 MB.
How to add pause?
To adjust the gap between scenes, click on the settings in the top panel. You can set the pause duration (in seconds) and hit save.
To add a pause between words, highlight the text and click the Pause option, setting the time inside the popup. Note that not all voices support pauses, so this option may not be available for some.
Where is voice cloning located in the Fliki app?
The voice cloning option is located on the Account page. You can also visit this URL to access the voice cloning feature in the Fliki App. You can click on 'clone voice,’ enter the voice name and gender, and record a consent script and a sample script for about 2 minutes without any background noise. It should be in the tone you would like the voice to sound.
Note: To use the voice cloning feature, you need the Premium plan.
What languages are supported for voice cloning in Fliki?
Currently, Voice Cloning is supported in
1. Arabic (Saudi Arabia)
2. Arabic (UAE)
3. Bulgarian (Bulgaria)
4. Chinese (Mandarin Simplified)
5. Croatian (Croatia)
6. Czech (Czech Republic)
7. Danish (Denmark)
8. Dutch (Netherlands)
9. English (Australia)
10. English (Canada)
11. English (India)
12. English (Singapore)
13. English (United Kingdom)
14. English (United States)
15. Filipino (Philippines)
16. Finnish (Finland)
17. French (France)
18. German (Germany)
19. Greek (Greece)
20. Hindi (India)
21. Hungarian (Hungary)
22. Indonesian (Indonesia)
23. Italian (Italy)
24. Japanese (Japan)
25. Korean (Korea)
26. Malay (Malaysia)
27. Norwegian (Norway)
28. Polish (Poland)
29. Portuguese (Brazil)
30. Portuguese (Portugal)
31. Romanian (Romania)
32. Russian (Russia)
33. Slovak (Slovakia)
34. Spanish (Mexico)
35. Spanish (Spain)
36. Swedish (Sweden)
37. Tamil (India)
38. Turkish (Turkey)
39. Ukrainian (Ukraine)
40. Vietnamese (Vietnam)
How can I make my cloned voice private again?
If you've previously made your cloned voice public and now wish to make it private, you can easily do so by following these steps:
Go to the Voice Cloning page.
Locate the cloned voice you want to make private and click the "Modify" button next to the cloned voice.
Uncheck the "Make Public" option in the modification settings.
Once you've unchecked the "Make Public" option, click the "Submit" button to save your changes.
That's it! Your cloned voice will now be set to private and no longer available to other Fliki users.
Can I upload an audio file as a sample for voice cloning?
No, Fliki doesn’t support uploading recorded files for voice cloning due to privacy and ethical concerns. Allowing uploads could lead to misuse of personal data and potential violation of individuals' rights, as we prioritize the protection of voices and identities.
Instead, we encourage the use of our live recording feature in the Fliki interface. This requires you to record a consent script along with a sample script for about 2 minutes. This approach ensures responsible usage of our AI voice cloning technology and helps maintain ethical standards in the creation of synthetic voices.
How many languages does Fliki support?
Fliki has over 2000 high quality AI voices in 80+ different languages and 100+ dialects, you can find all the voice samples here.
Idea to Video
What is Idea to Video?
Fliki has a very unique feature where you can create an entire video with voiceover, rich visuals, background music, avatars, AI art and more all of this by just entering a few words about what you would like the video to be about.
Find out more about how to use Idea to Video feature here.
What type of videos can I create with Idea to Video?
Fliki can create any type of videos from motivational to informational with this feature all you need to do is enter your idea what you would like the video to be about.
If you believe your video can be represented with stock visual you can go ahead with selecting “Stock media” option.
And if you need unique visuals tailored to your scenes we recommend checking the AI Art feature where Fliki will generate rich art based on the scene and theme of the video.
How long does it take to create a video using Idea to Video?
Fliki can create videos from 30sec to 15 mins with the Idea to Video feature, the time to create the video varies upon the length of the video selected and also the options chosen during the submission phase.
Why is the generated video shorter than the selected duration, and how can the content be adjusted to match the desired length?
When using the "Idea to Video" feature, the duration slider (e.g., selecting 15 minutes) sets the maximum possible length for the video - not a guaranteed length. The actual duration is determined by the amount and depth of content in your idea. If your idea can be effectively conveyed in a shorter time, the system will prioritize quality and relevance over simply filling time.
Before the video is generated, Fliki shows you a script preview along with an estimated content duration based on average reading speed. This gives you a clear idea of how long the video is likely to be. If you want the video to be longer, you can edit the script - adding more details, expanding on key points to better match your selected duration.
This approach helps ensure your final video is both engaging and appropriately paced, without unnecessary filler.
How to create TikTok videos, Youtube Shorts or Instagram Reels using Idea to Video?
You can easily create short videos by making sure the duration is set to 30s or 1min and proceeding with the video creation, make sure you’ve selected the aspect ratio of
Can I edit the video if I don’t like any part of the idea?
Yes, you can easily edit and modify the script, visuals, and other aspects of the video if you choose to do so.
Blog to Video
What is Blog to Video?
With Fliki’s Blog to Video feature you can convert your blog articles to video in a few minutes.
This video can include realistic voiceover, rich visual and even AI Art along with a soothing background music, just by adding the link to your blog post.
Find more details about how to use blog to video feature here.
What type of blog articles can I convert to video?
Fliki can handle any type of blog articles as long as they can be accessed by a public link.
Fliki also supports video creation in 80+ different languages.
Can I create a summary video of the blog article?
Yes, you can summarize the blog posts to create different lengths of the video.
You can also easily create short form video for Youtube Shorts, Instagram Reels and TikTok from your blog posts to improve engagement.
How long does it take to create a video from blog?
The estimated time depends on a lot of factors, including the length of the blog post, the length of the desired video along with the customization required for the video.
PPT to Video
What is PPT to Video?
With Fliki’s PPT to Video feature you can convert your Powerpoint Presentations into videos in a few minutes.
This video can include realistic voiceover, slides from your PPT along with a soothing background music, just by uploading your PPT.
Find more details about how to use PPT to video feature here
What format should my PPT be to convert it into video?
Fliki accepts PPT files in the .ppt extension and make sure the file is less than 100 MB.
Can I add my own voiceover on the video?
Yes, you can upload your own audio voiceover or use Fliki’s voice cloning feature to add your voiceover to the video slides.
Can I edit the voiceover script for my video?
Fliki will auto create the voiceover script based on your PPT, this can be easily edited like a document to have more control over the final video output.
Subscription
Which currency do you accept for payment?
Fliki accepts payments in USD currency via all major debit and credit cards. Fliki also accepts GPay, Apple Pay, and local payment wallets in supported countries.
Why Fliki consumes more credits than expected?
Fliki processes the content at every stage and uses state-of-art AI technologies to regenerate content at every update which consumes credits. Here's how credits are charged in Fliki:
AI Voiceovers
First Preview: When you preview a video (click the play icon), Fliki converts scene text to audio. Credits are based on total video duration:
Standard Voice: 0.5 credit per minute
Ultra-Realistic, Studio, or Cloned Voice: 1 credit per minute
Partial Changes:
Editing text in one scene only uses credits for that scene’s duration.
Recorded (Non-AI) Voiceover:
Using your own voice (no AI) uses no credits.
Video Export
Exporting a final video costs 1 credit per minute.
Images and Videos
Stock Images/Videos: No credits used.
AI-Generated Images:
Standard AI: 0.05 credits
Pro AI (higher quality): 0.1 credits
AI Video Clips (Premium Only)
Each AI-generated clip uses about 2 credits.
AI Avatars
0.25 credits per second of avatar footage.
Learn more about how different features affect your credit usage here.
What should I do if I've run out of credits or if my credit limit gets exhausted? How can I buy more credits?
Fliki doesn't provide the option to purchase additional credits. However, you can renew your subscription early once you've used more than 90% of your credits. This will refill your credits immediately. You’ll find the 'Renew plan' option in your Account section. A few things to keep in mind:
Renewing early resets your billing cycle – Your new renewal date will be the date you renew. So, if your original renewal was on the 14th, but you renew on the 9th, your next renewal will now be on the 9th moving forward.
We recommend waiting until you’ve fully used your credits – Any remaining credits will not carry over when you renew early, so it’s best to use them all before renewing.
Do you offer a discount for nonprofits and educational institutes?
Yes, we offer a 15% discount for nonprofits and educational institutes, please reach out to us to get your discount code at support@fliki.ai.
What are Double Value Weekends?
Double Value Weekends is a limited-time offer, available only for a few hours each weekend. During this period, all credit charges for content creation are halved, effectively doubling the value of your credits.
When the offer is active, you should see a banner on your Accounts page notifying you of the promotion. If you don’t see the banner, it likely means the offer isn’t active yet, and you’ll be charged for credits at the regular rate.
Can I have a team account in Fliki?
Yes, Fliki supports team plans to ensure you can manage your team subscriptions from one account and easily add members to your team.
Each team member would be assigned a new subscription and charged accordingly, and all the team credits would be shared across the team members.
Please note that Fliki does not support team collaboration yet, which is something we plan to add in the near future.
Will I incur charges for adding additional team members, and why?
Yes, you will be charged for adding additional team members. Each added team member contributes to the overall resources and benefits available to the team, including access to credits.
For instance, let's say your subscription plan is Standard, priced at $28 per month, and you decide to add two more team members. The monthly subscription charge would then be calculated as follows: $28 (Standard plan cost) + $28 (additional member) + $28 (additional member) = $84.
Moreover, with each new team member, the total available credits increase. For example, if your subscription plan includes three members and grants a total of 180 credits per member, the collective credit pool for the team would be 180 * 3 = 540 credits. This means all members have access to this shared pool of credits, allowing for increased usage and benefits across the team.
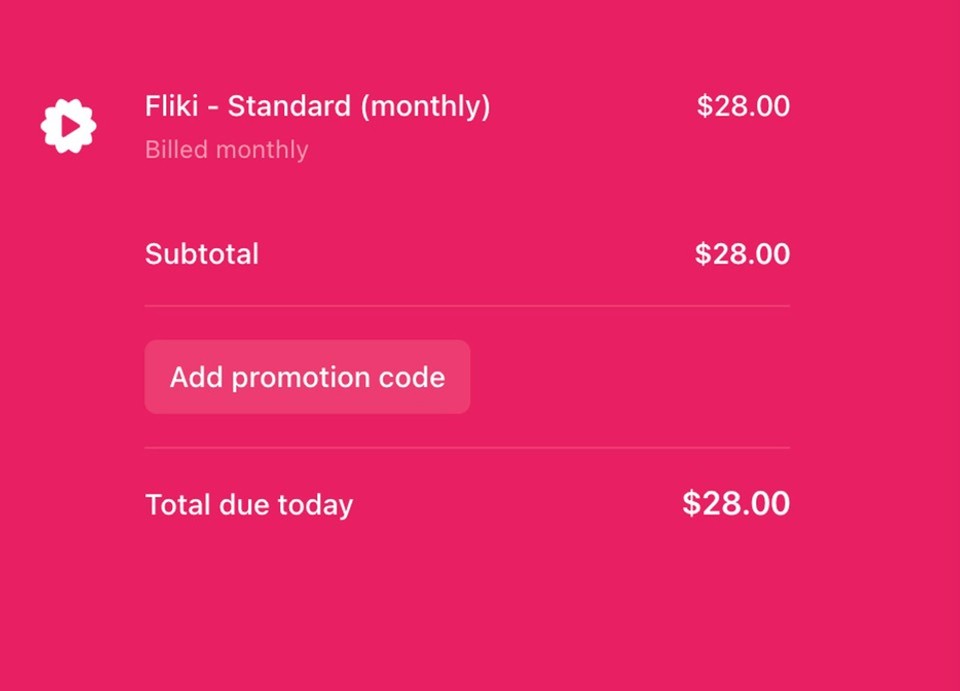
How to apply a discount code?
Head to the Account page, select “Subscribe to Fliki,” select your subscription, and click “Make Payment.”
Click on “Add Promotion code”.
Enter the coupon code, hit “Apply,” and proceed with your payment.
What is your refund policy?
We let everyone try all our features and keep using our product for free for as long as they want with no obligation to upgrade.
Unfortunately, once you have subscribed to the paid plans we can not issue a refund as this might lead to potential misuse and abuse of our services.
We have seen many cases of service abuse in the past where customers would generate a lot of content for their one-off needs and cancel the plan, leaving us with a huge bill to foot. We incur costs from AI services for every generation and hence need to have certain policies in place so we can sustain ourselves.
How to cancel my subscription auto-renewal?
You can cancel your subscription auto-renewal by heading to Account and selecting the "Manage subscription" option. Upon cancellation, you will not receive a refund for the fees already paid for your current subscription period, and you will be able to access the service until the end of the current subscription period.
Can I buy extra credits?
Yes, once you've exhausted 90% of your credits, you can renew your subscription to obtain additional credits. Simply navigate to the accounts section, then select 'Renew Plan' to make payment and renew your subscription.
How to stop Fliki from charging my card?
After subscribing, any user can cancel the auto-renewal by heading to Account -> Manage Billing -> Cancel Plan. If on the account page, it shows a free plan and you are unable to see the manage billing option, but you believe the payment processor is still trying to charge you, please reach out to support@fliki.ai. The Fliki support team will help you resolve the issue.
How can I remove the credit card associated with my account?
You can manage and remove your payment method by heading to Account and selecting the "Manage subscription" option. If you cannot access this option, please email support@fliki.ai; our team will gladly help.
How to get in touch with live chat support or a real person?
You can easily contact the Fliki team via email at support@fliki.ai regarding your query, and someone from the team will respond as soon as possible. You can also reach out to us via your Fliki account by clicking on the “?” mark button at the top right corner of the screen and selecting either the “Send us an email” or the “Chat—Human” option.