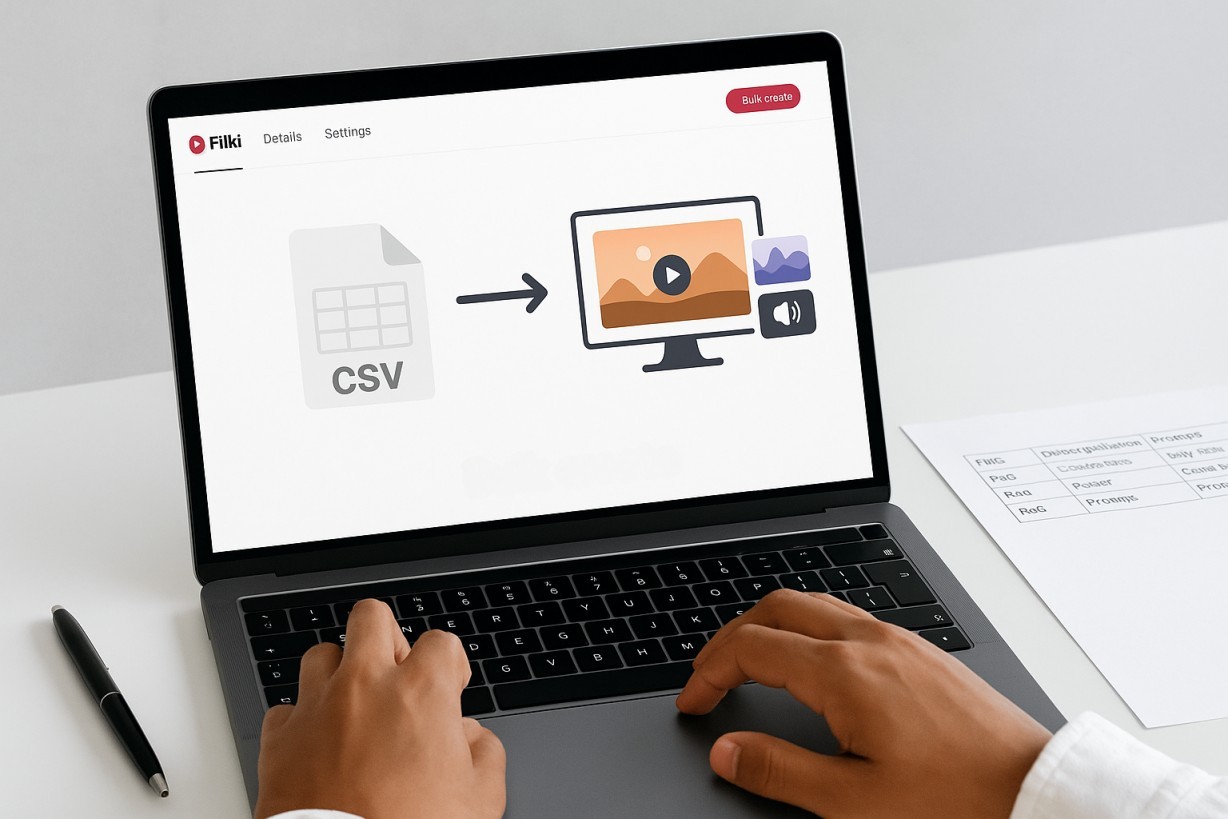
Create a video series in Fliki
Plan, produce, and schedule an entire series of videos from a single page. Whether you're a content creator posting weekly on YouTube, a therapist sharing wellness tips, or a business running educational campaigns, the Series feature lets you go from one idea to a full content calendar in minutes.
The new Series builder is a "describe once" workflow. You write a title and description, Fliki drafts an episode plan and derives every setting from it, and then it writes each episode's script automatically right before that episode renders. You can review and adjust anything before you start.
Before you start: who is this for?
The Series feature is built for anyone who needs consistent, recurring video content without producing each video from scratch. It benefits:
Professionals (doctors, lawyers, therapists, accountants) who want to establish authority by publishing a regular stream of educational videos. A therapist could run a weekly mental health tips series; an accountant could produce a tax season advice series, all with consistent branding and scheduling.
Content creators and influencers trying to stay consistent on YouTube, Instagram, or TikTok. Series removes the biggest bottleneck: coming up with ideas and producing them one by one.
Businesses and marketing teams using video for lead generation, product education, or thought leadership. Set it once, and Fliki handles planning, production, scheduling, and publishing.
How Series maintains context across episodes
Unlike creating standalone videos one at a time, Series treats your content as a connected journey, not isolated pieces. Fliki keeps track of what each episode covers and builds on that context as the series progresses. This means topics evolve instead of repeating, depth can increase over time, later episodes can reference earlier ones, and your audience is guided through a structured path.
Because scripts are written automatically right before each episode renders, every episode reflects the latest state of your plan and the ones that came before it, so the series feels intentional rather than repetitive.
Now let's walk through creating a series from start to finish.
Step 1 - Open the Series page and start a new series
Make sure you have an active paid subscription on your Fliki account.
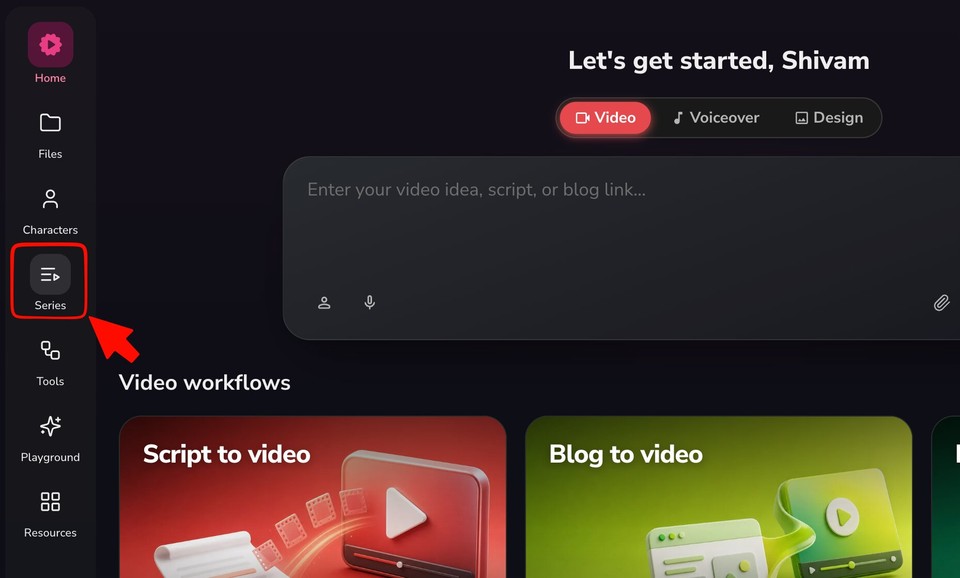
In the left sidebar, click Series.
On the Series page, start a new series. This opens the Create a series builder.
Step 2 - Describe your series
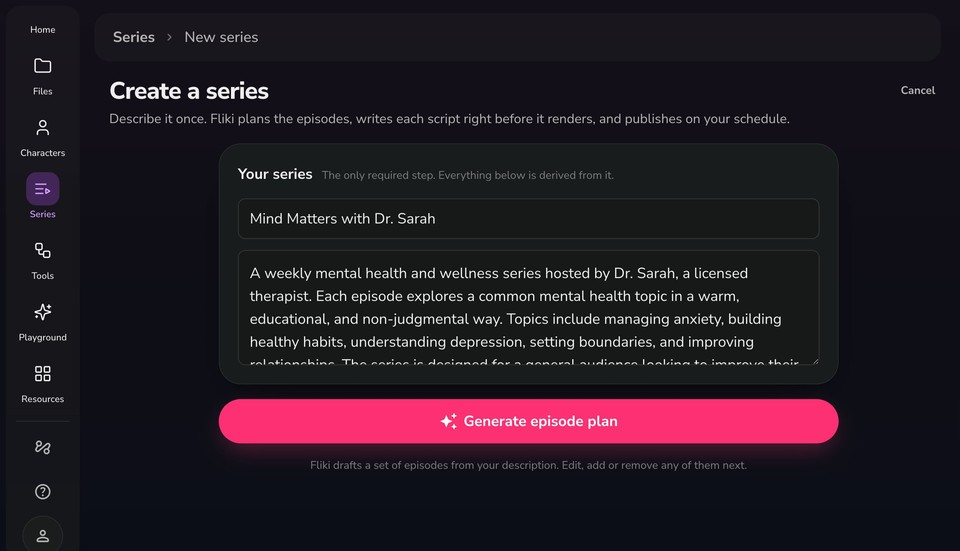
This is the only required step. Everything else is derived from what you write here.
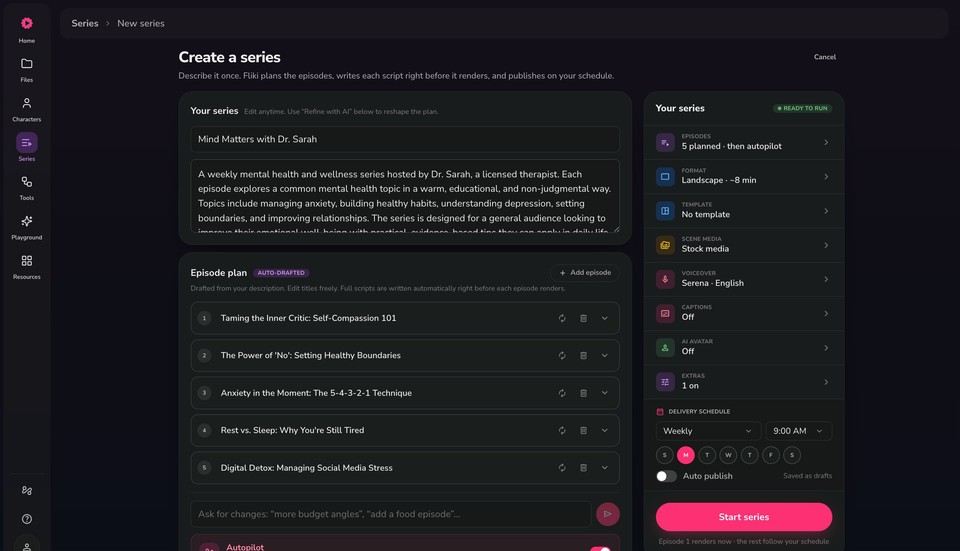
Series title - Enter a clear, descriptive name, for example "Mind Matters with Dr. Sarah" or "Best places to visit in your 30's."
Description - Describe what the series is about: the core topic, scope, and any recurring characters or segments. The more detail you give, the better Fliki plans the episodes and derives the tone, audience, and settings.
Once your title and description are in, click Generate episode plan. Fliki drafts a set of episodes from your description, which you can edit, add to, or remove next.
Why the description matters: Fliki reads it to auto-draft your episode lineup and to suggest the tone, audience, use cases, format, and voice. A vague description produces generic results. A detailed one gives you a series that feels tailored from the start.
Step 3 - Get to know the builder
After generating, you land on the single-page builder:
The left side holds your series title and description (editable anytime) and the Episode plan.
The right rail ("Your series") summarizes every setting: Episodes, Format, Template, Scene media, Voiceover, Captions, AI avatar, Extras, and the Delivery schedule. A green READY TO RUN badge appears once your series can be started.
Tap any row in the rail to expand its panel and change just that setting. Everything is prefilled from your description, so you only adjust what you want.
Step 4 - Review and refine the episode plan
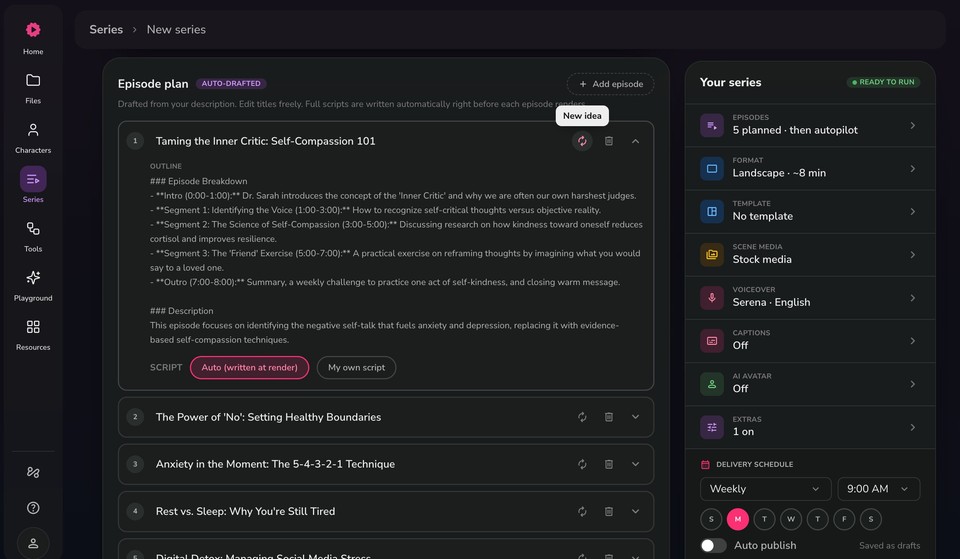
The Episode plan is marked AUTO-DRAFTED. Each episode has a title and, when expanded, an outline (an episode breakdown with timed sections, plus a short description). Full scripts are written automatically right before each episode renders, so you do not need to write them up front.
For each episode you can:
Edit the title and outline directly by clicking into the text.
Choose how the script is created using the SCRIPT toggle: Auto (written at render) lets Fliki write it just before rendering, or My own script lets you paste your own.
Regenerate an episode with the New idea (refresh) icon, or remove it with the trash icon.
Add an episode with the + Add episode button.
To reshape the whole plan at once, use the Refine with AI chat field at the bottom (for example, "more budget angles" or "add a food episode"), and Fliki updates the lineup for you.
The rail shows your episode count as, for example, 5 planned, then autopilot. That means Fliki produces your planned episodes and can then keep generating new ones automatically to continue the series. Use the Autopilot toggle to control this.
Step 5 - Set the format and template
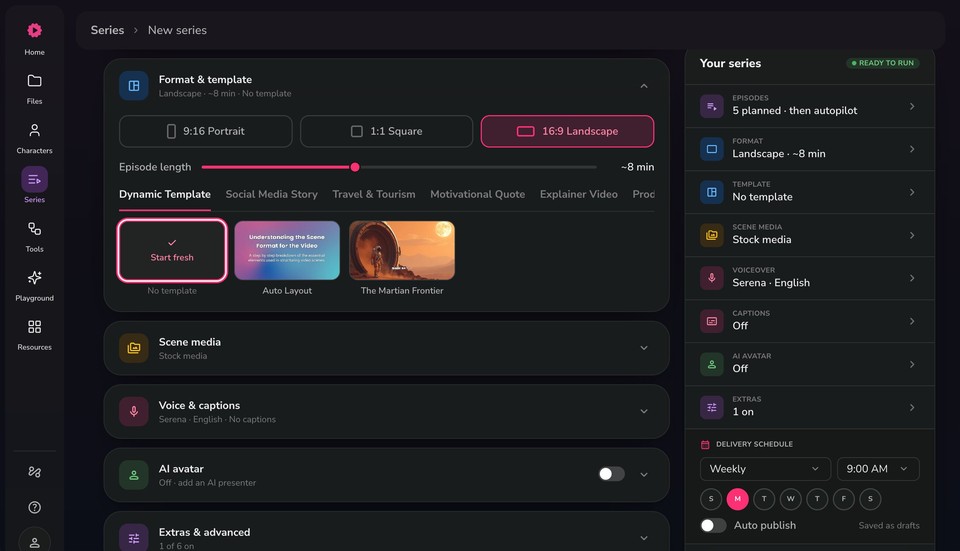
Open Format & template from the rail to set:
Aspect ratio - 9:16 Portrait (TikTok, Reels, Shorts), 1:1 Square (social feeds), or 16:9 Landscape (YouTube).
Episode length - Drag the slider to set the target length for each episode (for example, ~8 min).
Template - Browse categories such as Dynamic Template, Social Media Story, Travel & Tourism, Motivational Quote, and Explainer Video, or choose Start fresh (No template) to build clean scenes.
Step 6 - Choose your scene media
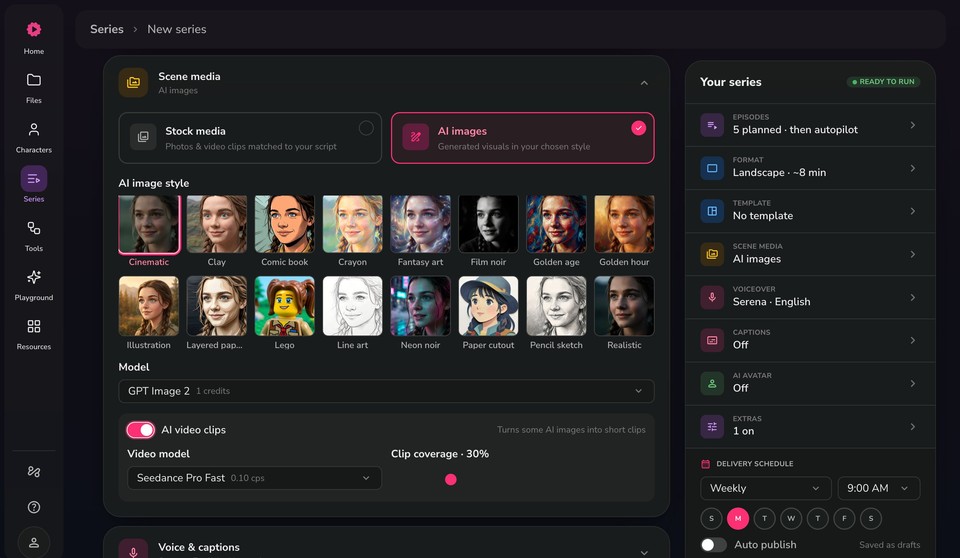
Open Scene media to choose how your visuals are created:
Stock media - Stock Photos and video clips matched to your script.
AI images - Generated visuals in a style you pick from the gallery (Cinematic, Clay, Comic book, Crayon, Fantasy art, Film noir, Golden hour, Illustration, Lego, Line art, Neon noir, Paper cutout, Pencil sketch, Realistic, and more).
When AI images are selected, set the Model (for example, GPT Image 2), and optionally turn on AI video clips to convert some AI images into short moving clips. Pick a Video model (for example, Seedance Pro Fast) and set the Clip coverage percentage.
Step 7 - Set the voice and captions

Open Voice & captions to configure narration and subtitles:
Language and Dialect - Choose from 80+ languages and their regional dialects.
Voice - Keep the suggested voice (for example, Serena, English, United States) or click Browse voices to pick another.
Captions - Toggle captions on or off, then pick a style from the gallery (grouped into sets like Business and Social), for example Minimal Classic, Basic, Simple Glow, Boxed Blue, Navy Serif, or Pop Lime.
Step 8 - Add an AI avatar (optional)

Open AI avatar to feature a presenter in your episodes. Toggle it on and pick an avatar (for example, Grace). The avatar fronts intro and outro style scenes, and you can adjust it per episode later. Leave it off if you want visuals-only episodes.
Step 9 - Configure extras and tone & audience
Open Extras & advanced to enable optional features:
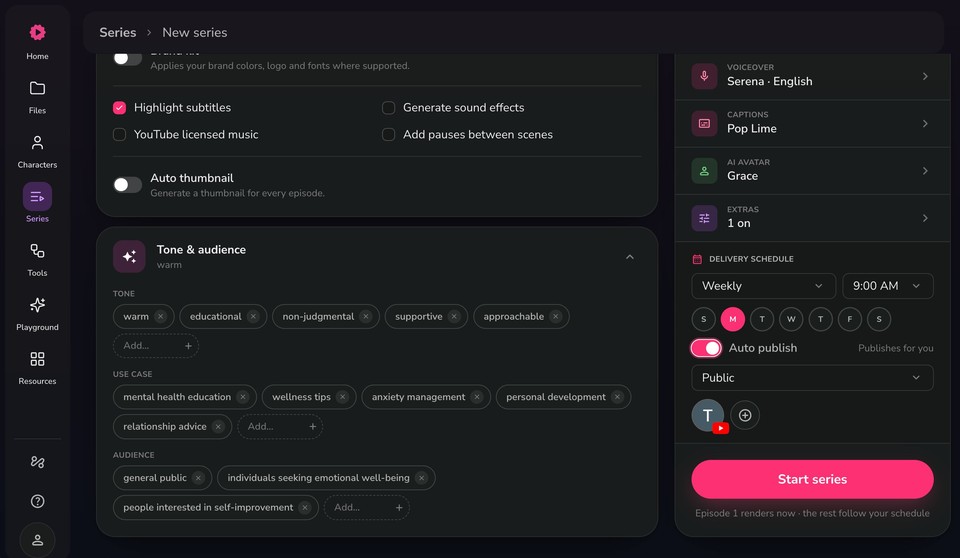
Brand kit - Applies your brand colors, logo, and fonts where supported.
Highlight subtitles, Generate sound effects, YouTube licensed music, and Add pauses between scenes.
Auto thumbnail - Generates a thumbnail for every episode.
Open Tone & audience to review the tags Fliki derived from your description. Add or remove tags under Tone (for example, warm, educational, supportive), Use case (for example, mental health education, wellness tips), and Audience (for example, general public, people interested in self-improvement). These guide the writing across every episode.
Step 10 - Set your delivery schedule
In the Delivery schedule section of the rail, decide when and how episodes go out:
Frequency - For example, Weekly or Monthly.
Time - The time of day episodes are produced (for example, 9:00 AM).
Days - Select which day(s) episodes should run (for example, Monday).
Auto publish - Turn on to publish each episode automatically after it renders. When off, episodes are saved as drafts for you to review. When on, choose a visibility (for example, Public) and connect the destination channel, such as your YouTube or TikTok account.
Step 11 - Start your series
When the rail shows READY TO RUN, click Start series. Episode 1 renders right away, and the rest follow your delivery schedule. If Auto publish is on, rendered episodes are published to your connected channel automatically; if it is off, they wait as drafts for your review.
Managing your series after launch
Once your series is active, open it anytime from the Series page to:
Edit the title, description, episode plan, or any setting in the rail.
Adjust an individual episode, switch it between Auto and your own script, or regenerate it.
Pause or resume production, change the schedule, or turn Autopilot on or off to keep new episodes flowing.
Tips for getting the best results
Write a detailed description. It drives the episode plan and every derived setting, so include the host's name, the format of each episode, the topics to cover, and the visual style.
Use Refine with AI to iterate. Reshaping the plan by chat is faster than editing episodes one by one. Just describe the change you want.
Match your aspect ratio to your platform. Landscape for YouTube, Portrait for TikTok and Reels, Square for general social feeds.
Start with Auto publish off. Review the first episodes as drafts, and turn on Auto publish once you're happy with the quality.
Apply a Brand kit and template for consistency. This keeps every episode on-brand without manual adjustments.
Let Autopilot run the long game. After your planned episodes, Autopilot can keep the series going on your schedule, so your channel stays consistent with no extra setup.
With Series, you're not producing videos one at a time, you're building a content engine that plans, scripts, produces, and publishes on autopilot. Set it up once, and focus on growing your audience.